In part 1 of this project I took you through the design and basic cutting of the wood for the rack and in this part I will cover the assembly.
At this point I had all the basic parts of the rack cut and sanded so this was my list of what I did next:
- Assemble, sand and paint the frames
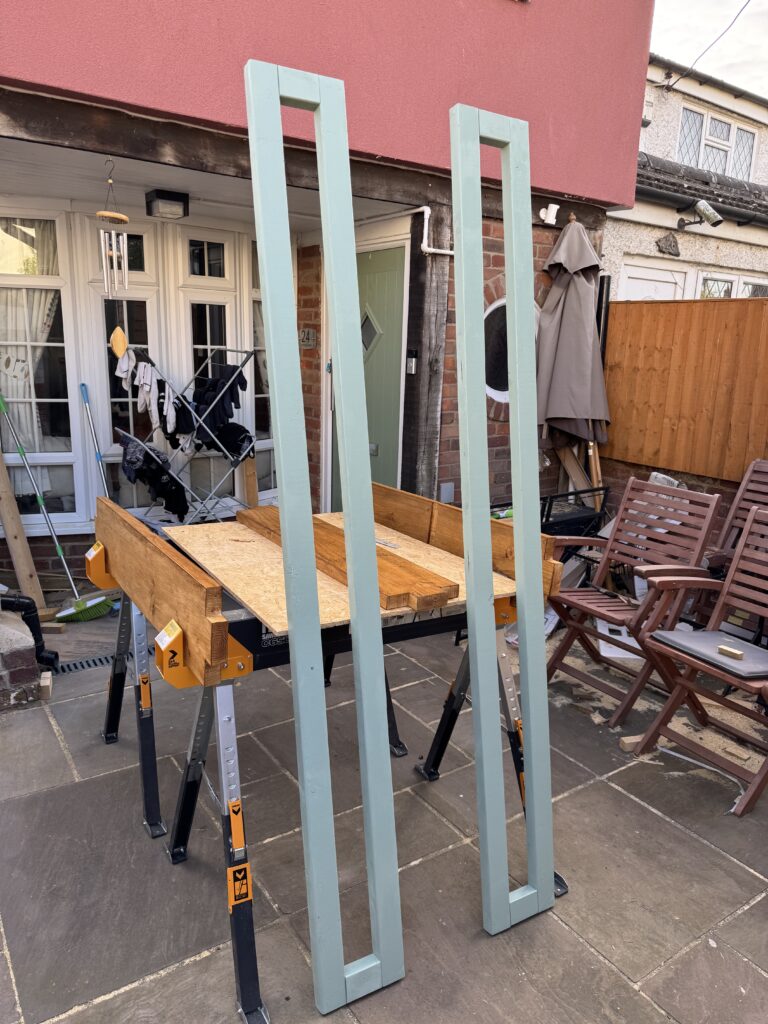
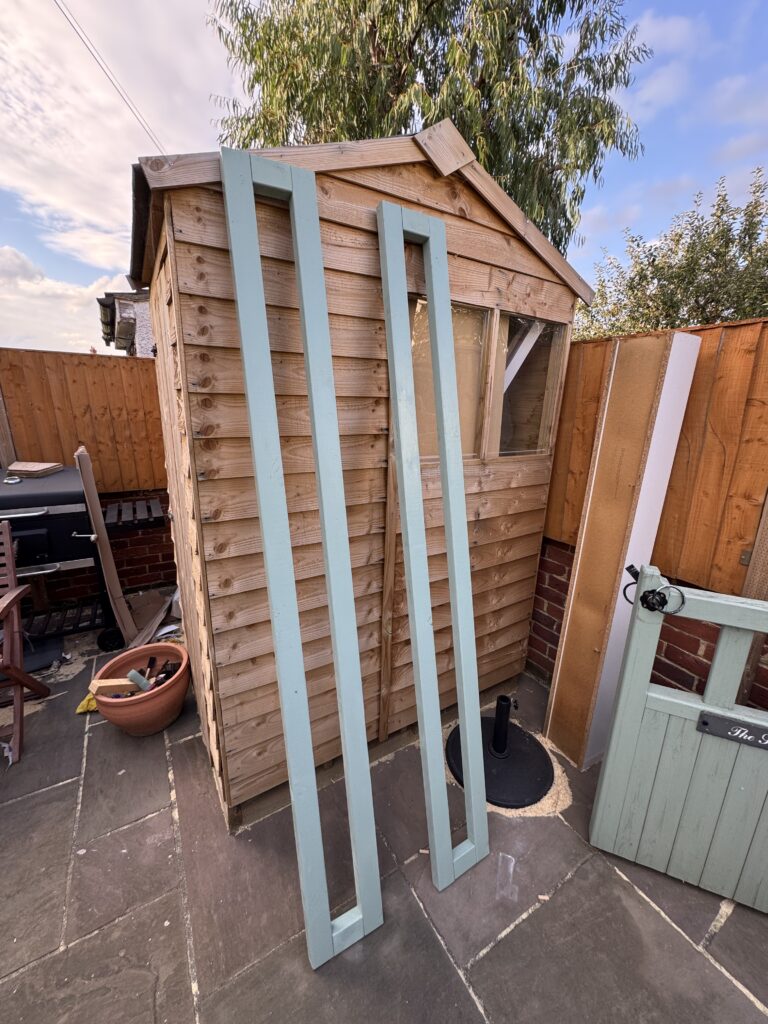
My idea behind the frames was to make them out of C-16 timber, lightly sand them down and then paint them in a Matt Chartwell green colour.
The assembly went well and I managed to get each section nicely square, so whilst it looked like a bit of stud framing – it was good looking stud framing. I painted both frames which turned into a little bit more of a mission than I had anticipated.
When I bought the paint from Amazon I didn’t really read the description, but I knew something wasn’t quite right when I opened the can. I thought that I had purchased an emulsion – but the smell that hit me immediately said that it was clearly a solvent based paint!
I should have known really – if I had been paying to the Amazon listing when it said if could be used on wood – but also uPVC windows and doors.
You might be thinking – why was this an issue? Well, whilst it could still be used for wood – and – was ultimately a really good paint – my intention was to apply it with a foam roller. Turns out the stuff starts to rot the rollers very quickly, where the fibers got mixed into the paint finish very quickly and when I say quickly – this paint “went off” in about 7 minutes which on the one hand is amazing – but on the other meant that I needed to switch to a paint brush for another coat and sand it down between coats to get rid of the fibers which had dried into the finish.
Anyhow, I managed to get the paint job looking pretty smart and in the end, even with having to sand it back it didn’t take me too long.
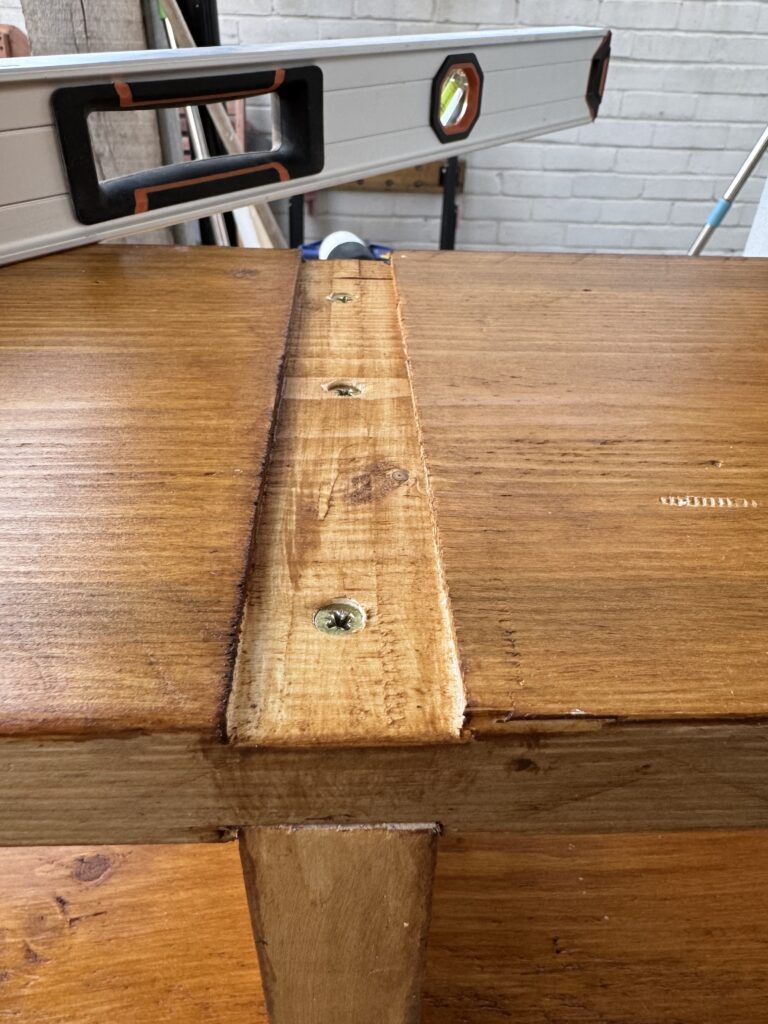
After that blip all was going swimmingly until I cut the recesses on the corners for the shelving elements (more on this in a bit) as I cut them the wrong way around – basically the width of the frames were now too large. So, after some swearing I cut some more C-16 at 95mm for the top and bottom parts of the frame (down from around 120mm) and pulled the old ones out and rebuilt the frames.
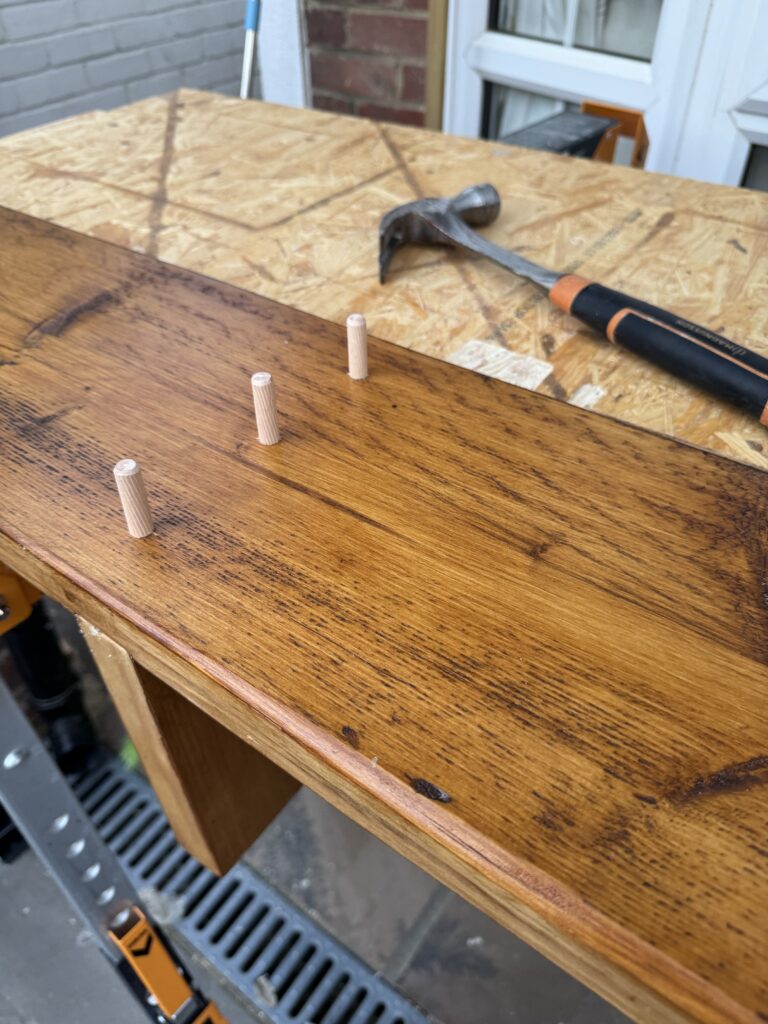
Of course in doing so changed the positioning of the frame elements so I had some holes additional holes which now needed plugging with dowels and then some further wood filling and then a tiny bit of painting – but I got there and they were finally finished.
- Make the pine back board for the coat hooks and stain
This was quite a nice and easy job in the context of the whole project.
I wanted the back board to be made of pine – but, I didn’t fancy the hassle of getting some pine lengths of timber, doweling them and then securing with wood glue. So I came up with the idea of using some pine T & G flooring lengths cut to size on the Miter saw and then slotting them together with wood glue. I then cut the excess tongue off with my circular saw and then clamped them together overnight whilst the wood glue cured.
The following day I sanded the panel directly to a 240 grit and then applied the first of 3 coats of the Ronseal stain. I didn’t need to take the panel from a lower grit as it was already semi finished anyhow and I didn’t want to take too much material off so 240 was fine.
I have to admit when the first coat went on I was unsure of the colour and the finish – but, thankfully the second coat brought it up really nicely and went on so easily so I breathed a sigh of relief as the prospect of taking it all back to the wood and breaking out the Osmo stain filled me with dread! Between the 2nd coat and final 3rd coat it was recommended that you do a light sand on the material with a high grit paper – so I broke out a 600 grit disc and lightly went over the panel with my Orbital Sander and the finish was amazing!
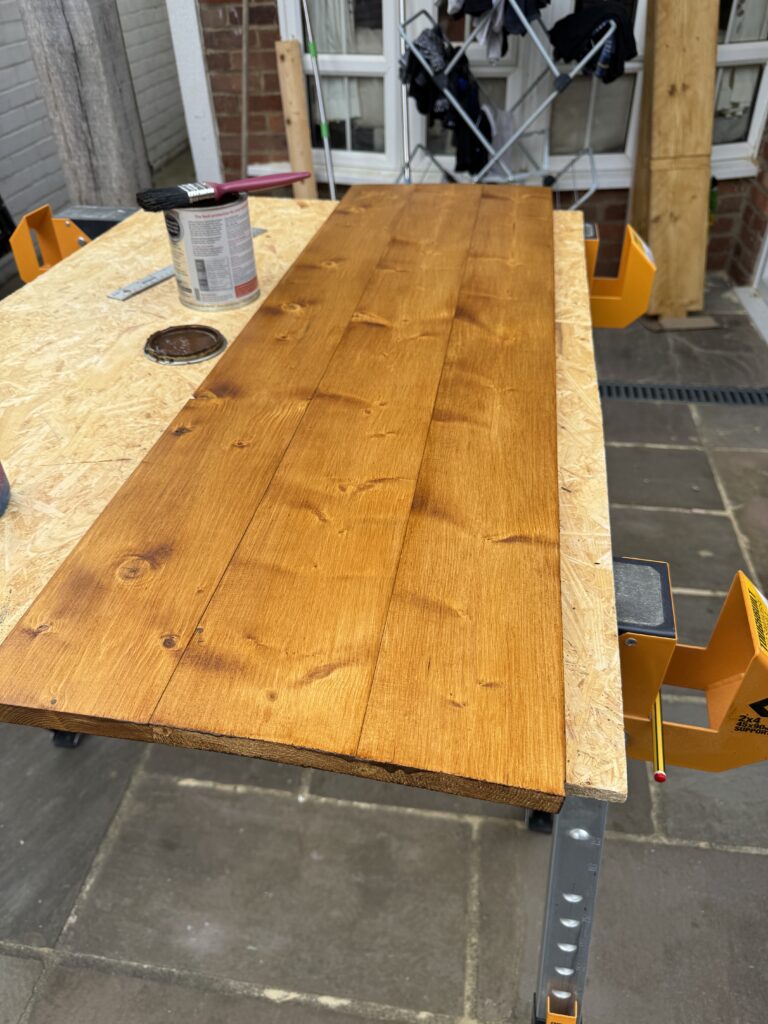
- Stain the shoe shelving
This step went pretty much the same as the staining of the backboard. First coat looked a little pants – but the 2nd and 3rd coats brought the wood up amazingly.
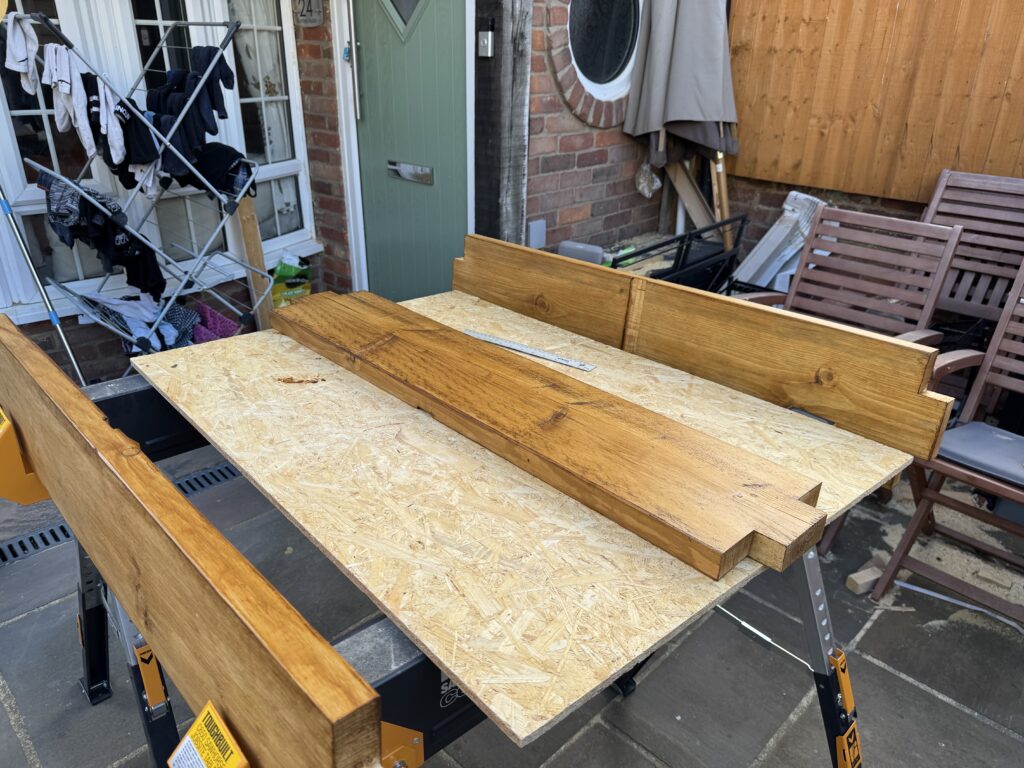
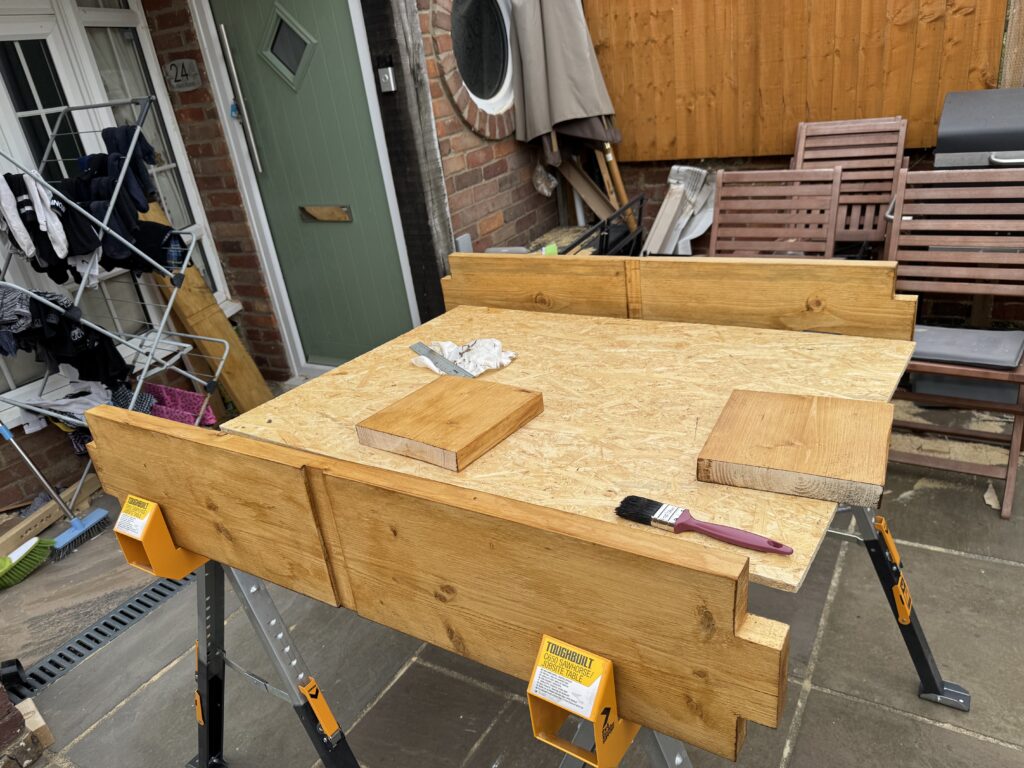
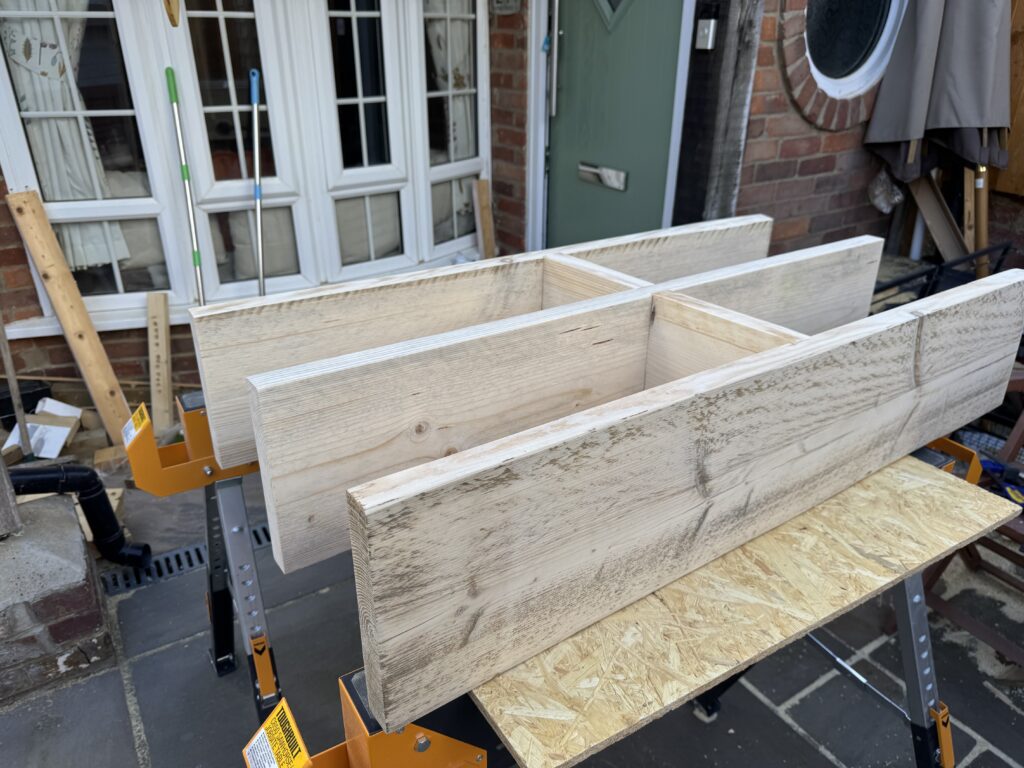
- Assemble the shoe shelving and then plug
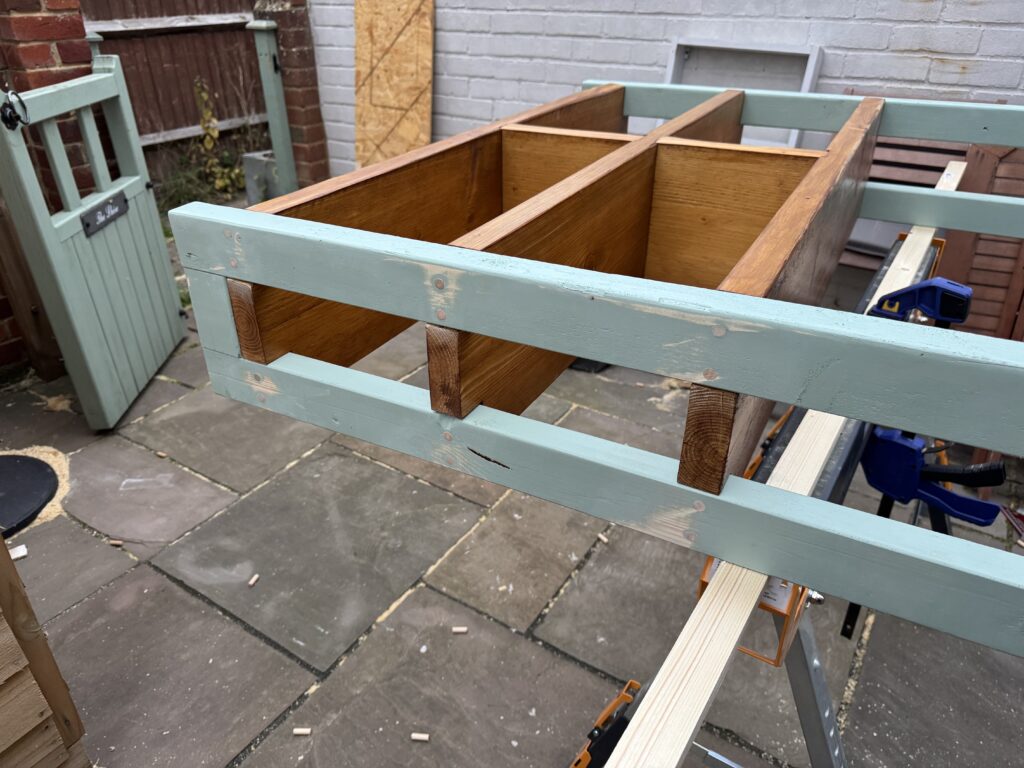
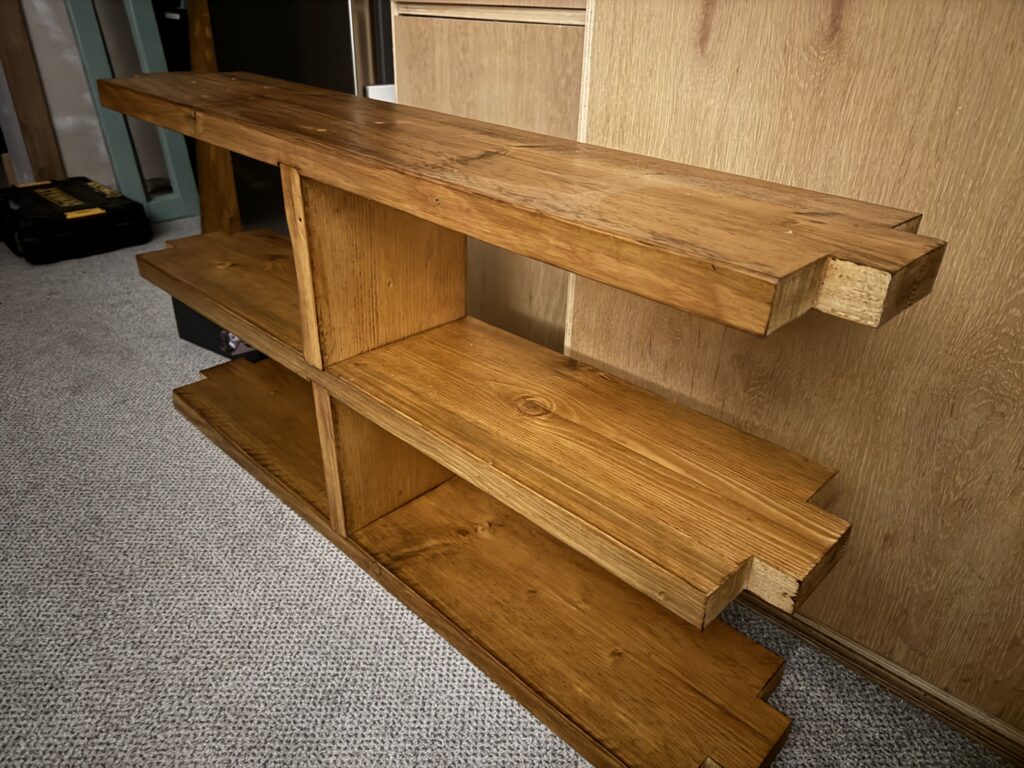
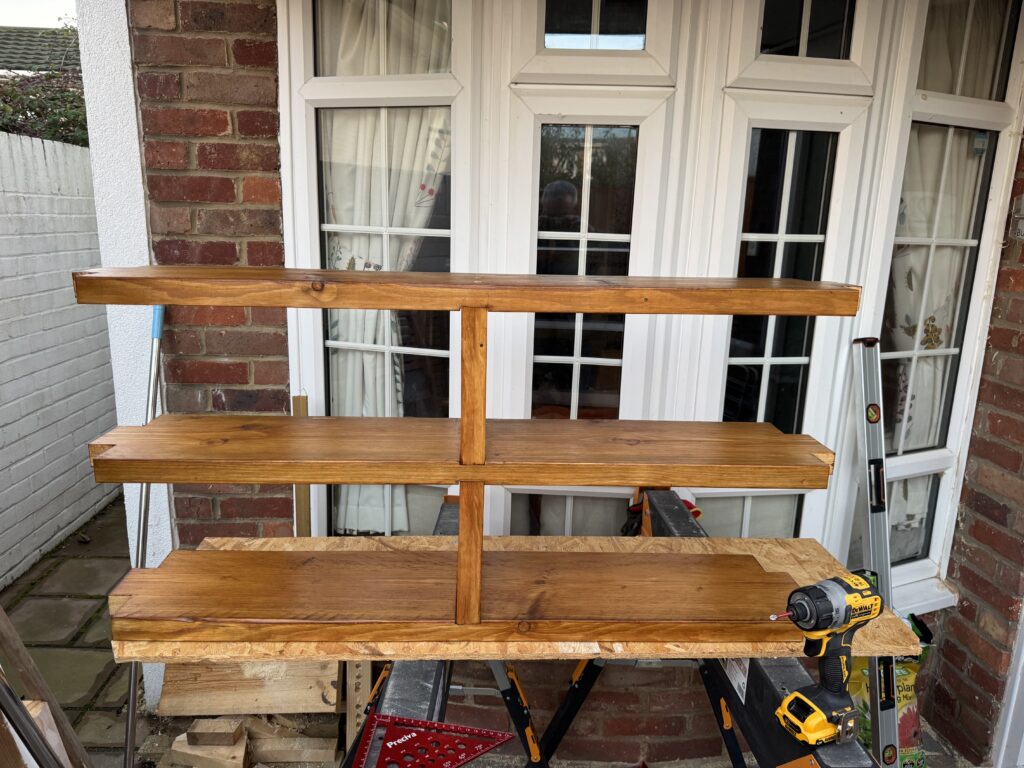
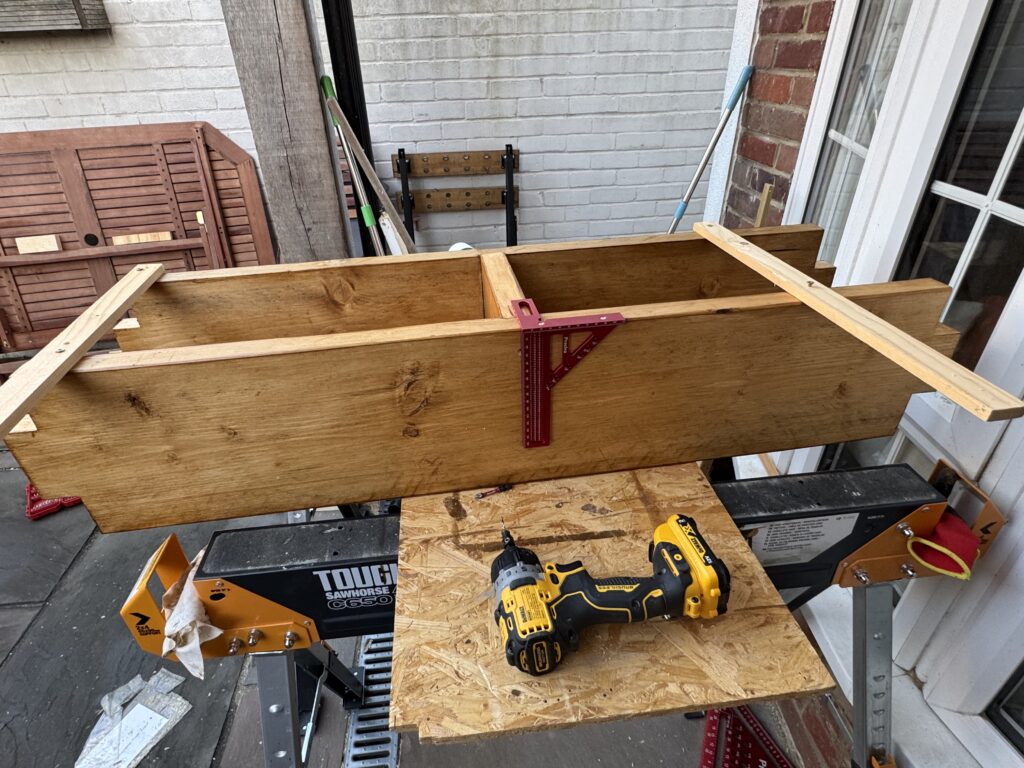
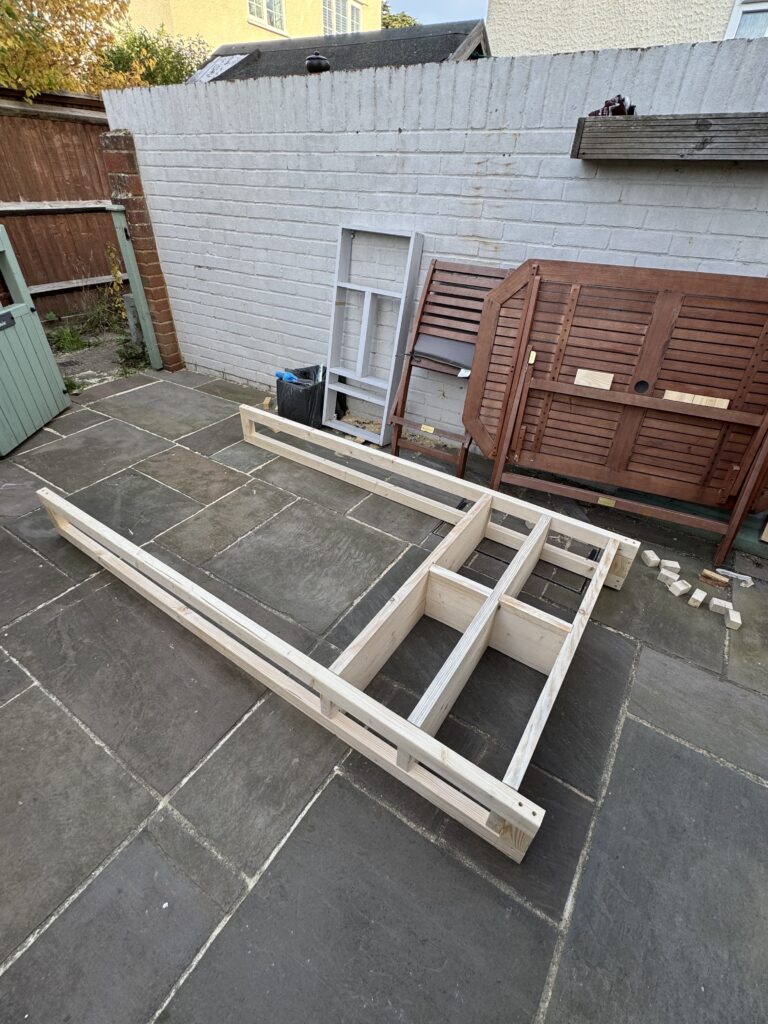
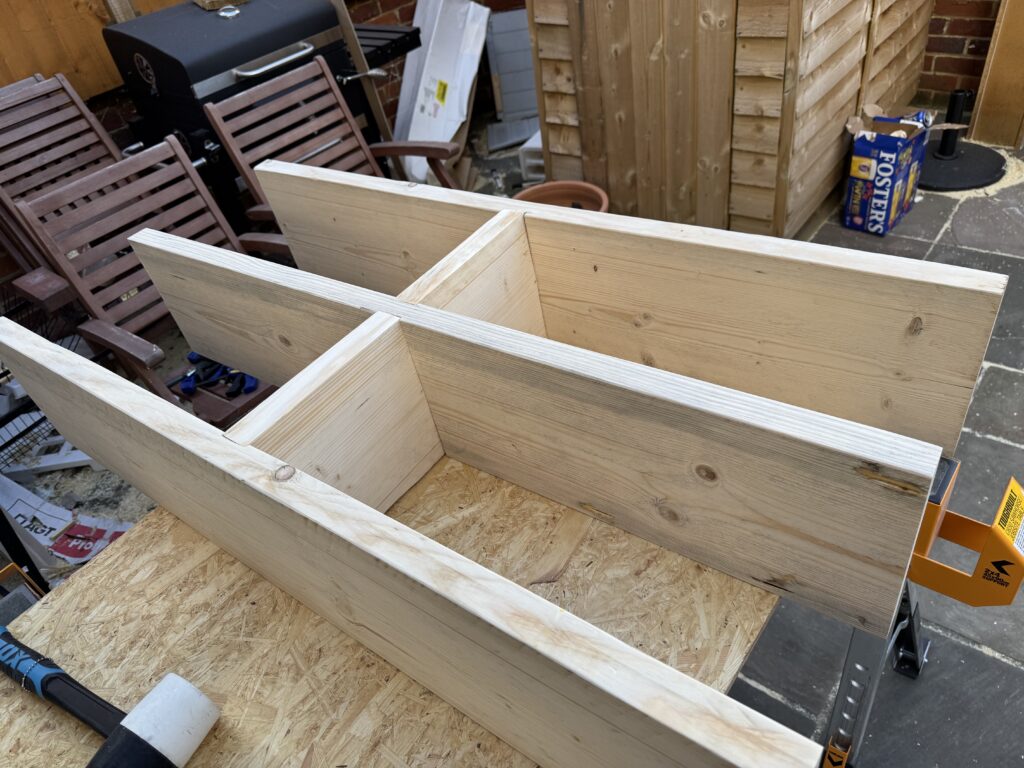
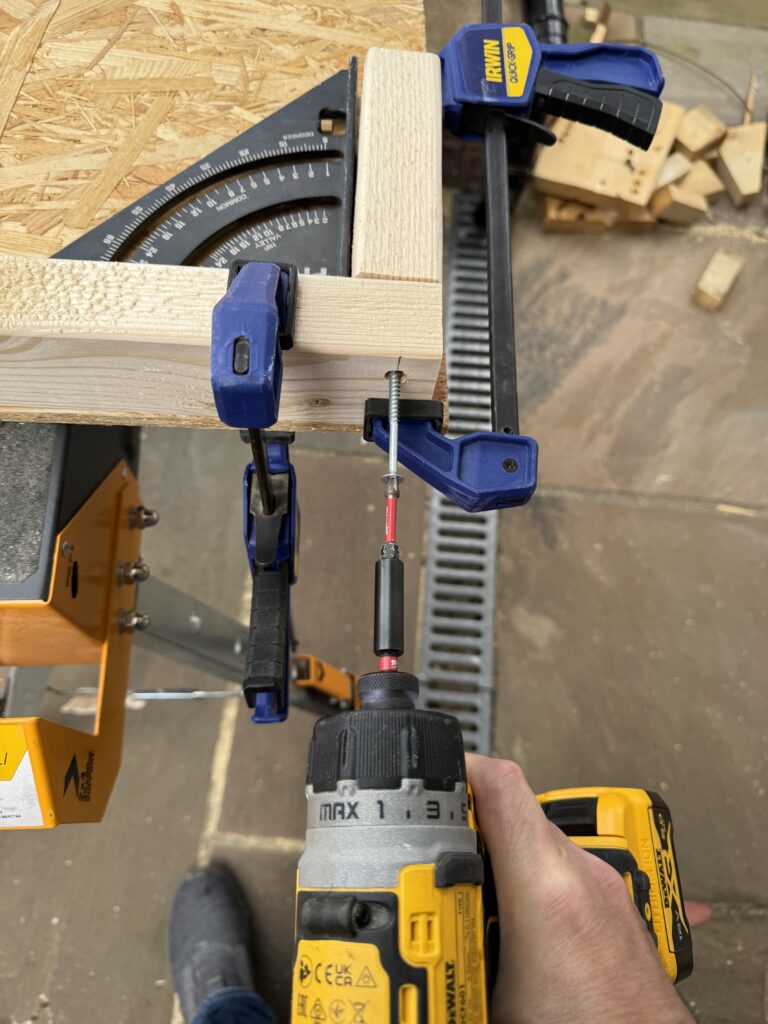
I knew that this was going to be an “interesting” part of the build. The shelving as made up of three tiers (top, middle and bottom) where each would be separated with two dividers running down the centre. The sides of the shelf were in fact the frames.
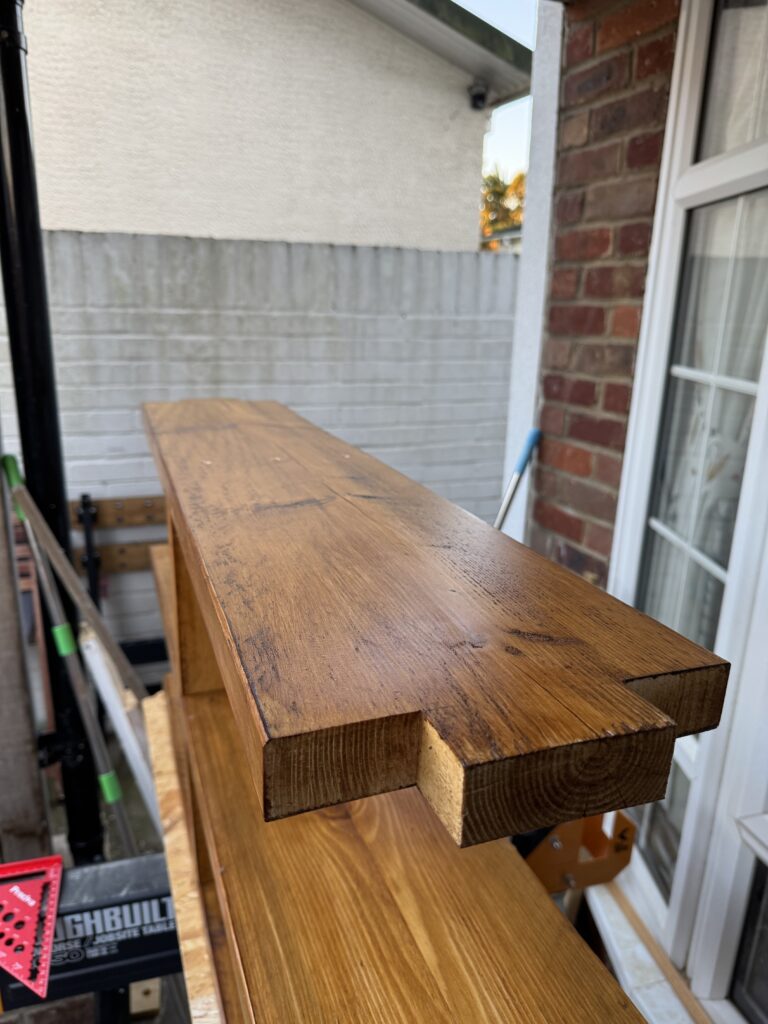
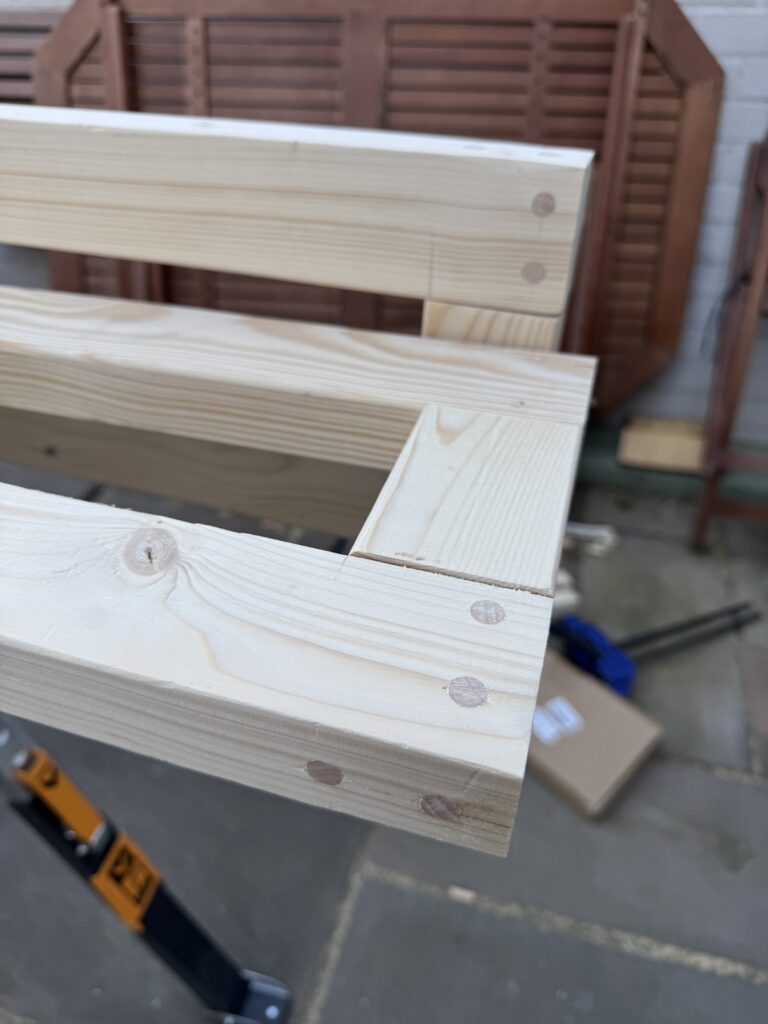
Using my Trim Router I cut some 4mm recesses down the middle of each shelf for the dividers as when finished it would give the illusion that the whole thing was “joined” rather than screwed together (I am not quite at the stage of experimenting with proper joinery) and my plan was to have no visible screws.
My idea was to “slide” the shelves into the gap in the middle of each frame – but in order to do this I knew that I had to semi build the shelves and dividers in order to slide them in. This was tricky as without any sides to the shelves keeping them level would be a challenge. So to start me off I used a couple of bits of off cut ripped timber to secure the shelving whilst I got everything level, square and then fixed together with screws. After everything was square, level and secured I removed the off cuts.
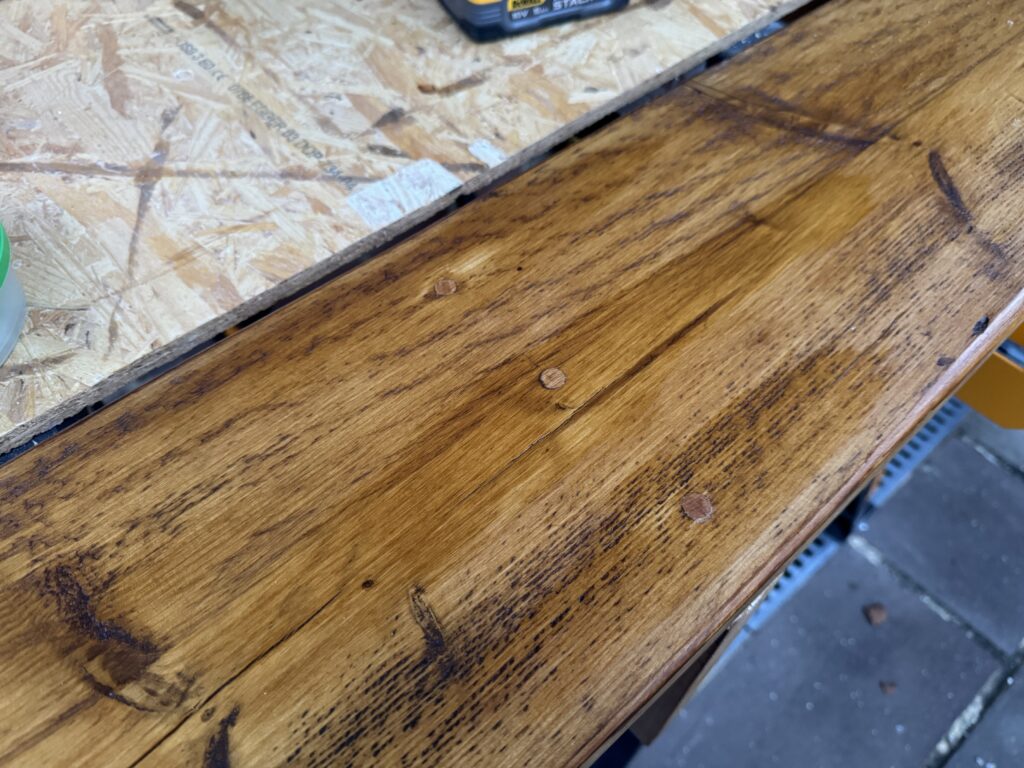
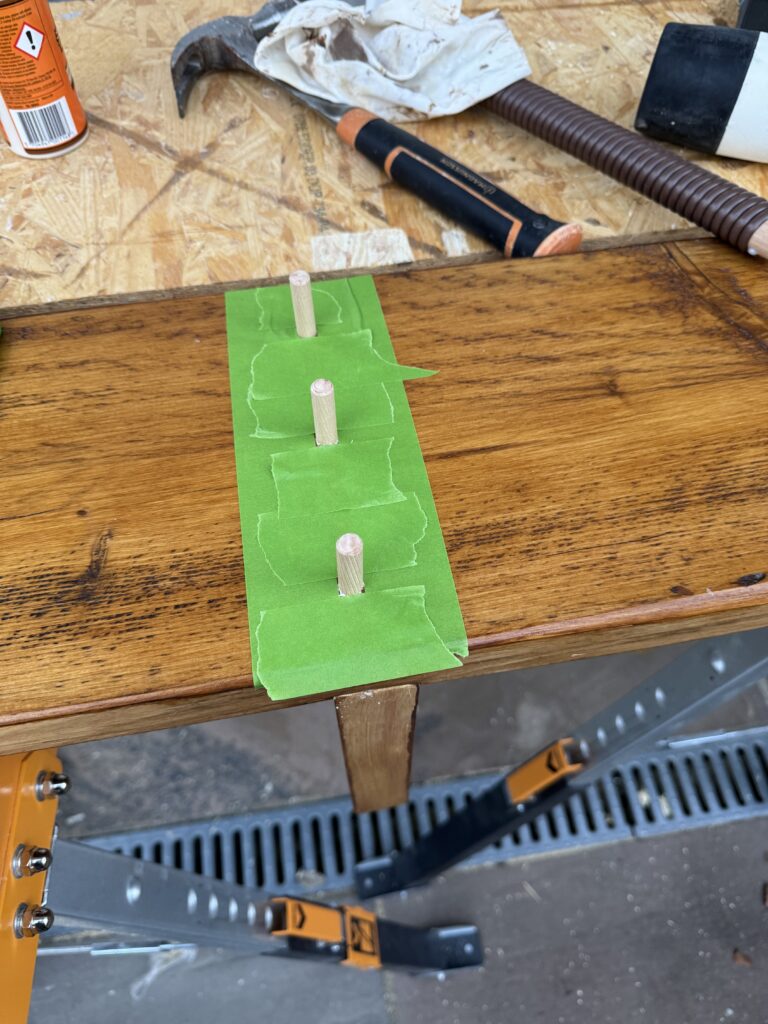
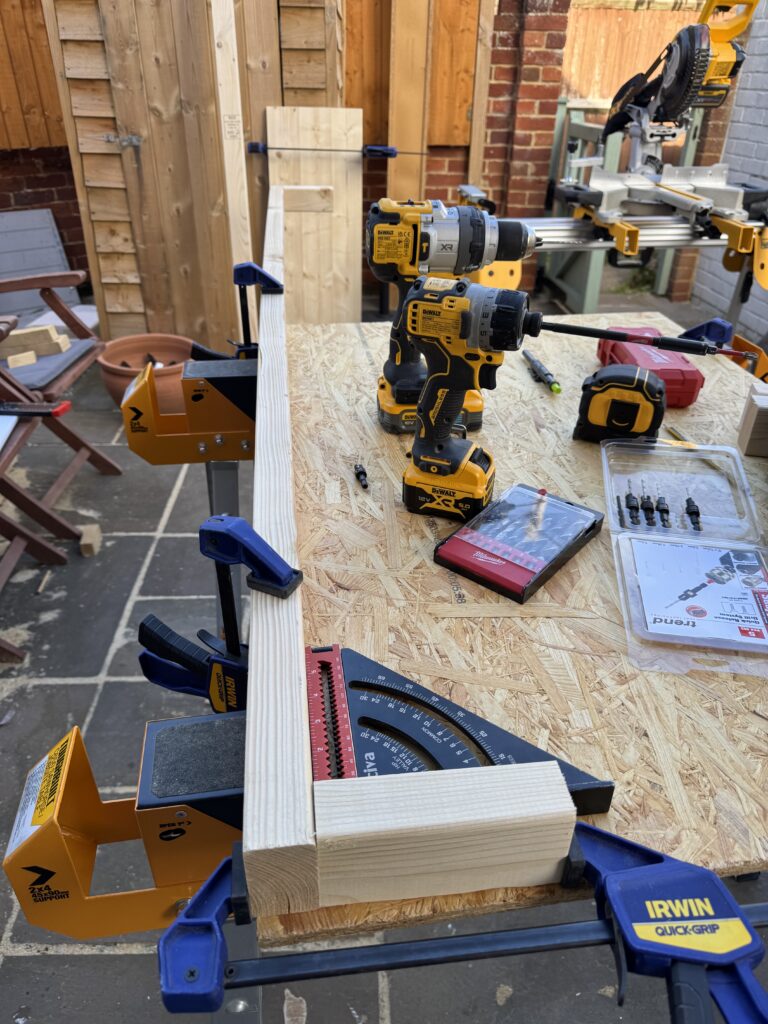
However in line with my design principle of no visible fixings I needed to plug the screw holes which I had drilled into the middle of the top shelf. As I had already stained this, I punched in the dowels and then used Frog Tape to mask around them then cut them as flush as I could using my Japanese carpentry saw then finished them off with a high grit light sand and re-stain.
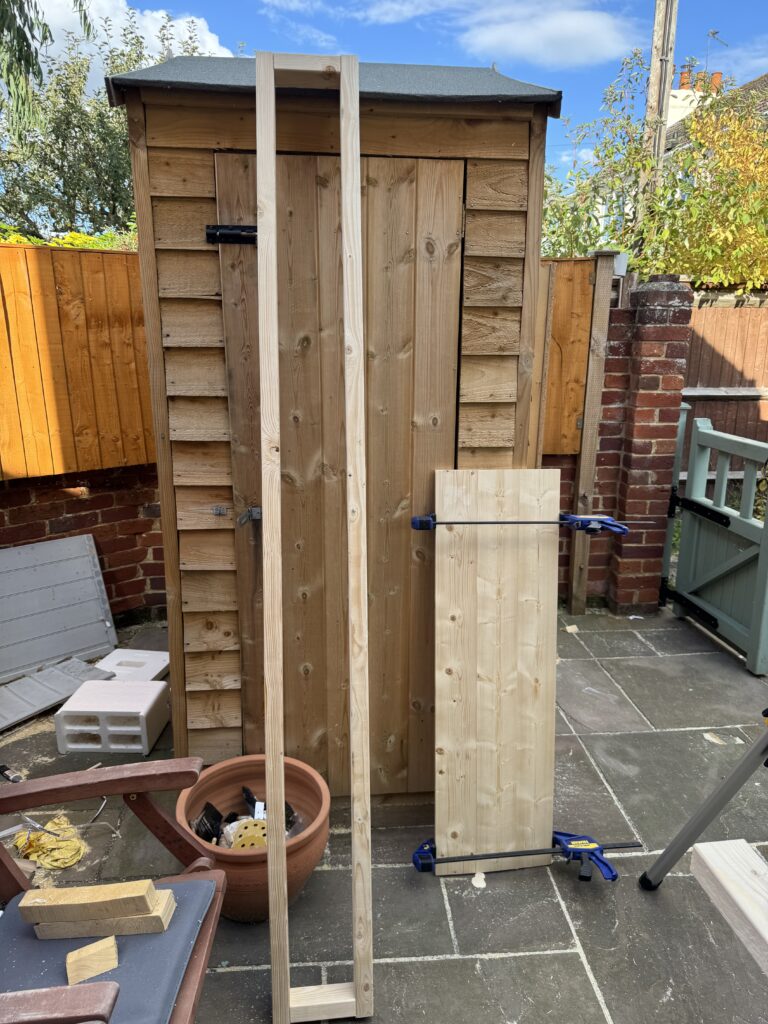
- Attach the frame to the shelving
Now this I knew was going to be a bastard of the thing to do. Outside of the kitchen – this project was my biggest most complicated project to date. I also knew that it was going to be heavy with an uneven distribution of weight so getting it together without either hurting myself or damaging it was going to be challenging.
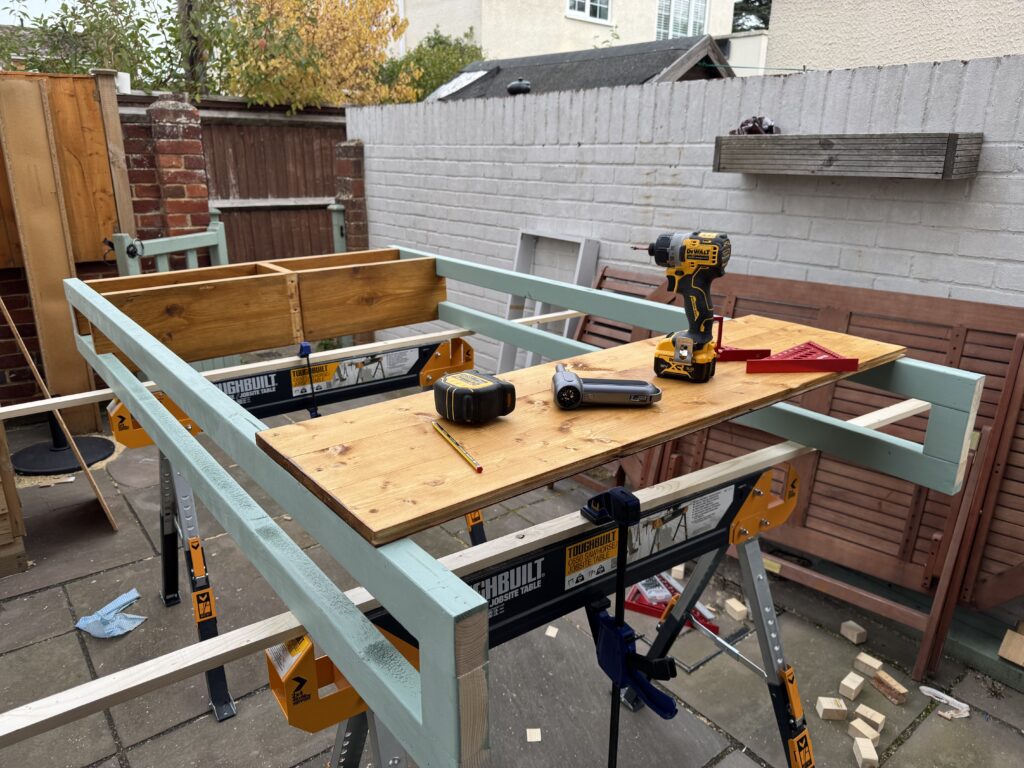
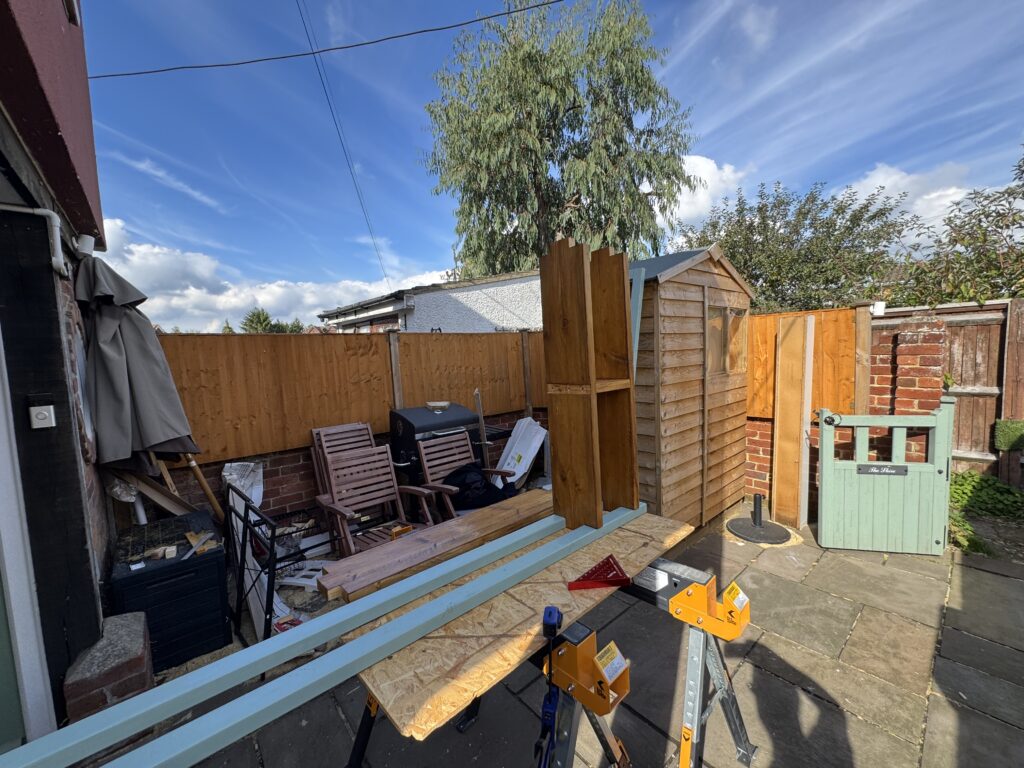
The whole unit when assembled was wider than my saw horses (which was a problem on so many levels) so I came up with the idea of “extending” the horses using some rough sawn timber I had laying around.
My approach was to join the shelving to the frames in two parts – I had built them as a top and bottom assembly so the bottom of the shelf could go into the frame first, be leveled and squared and then screwed and then insert the top.
The idea behind this was to lighten the weight of the material that I was working with at a given point as the shelving is quite heavy when put together.
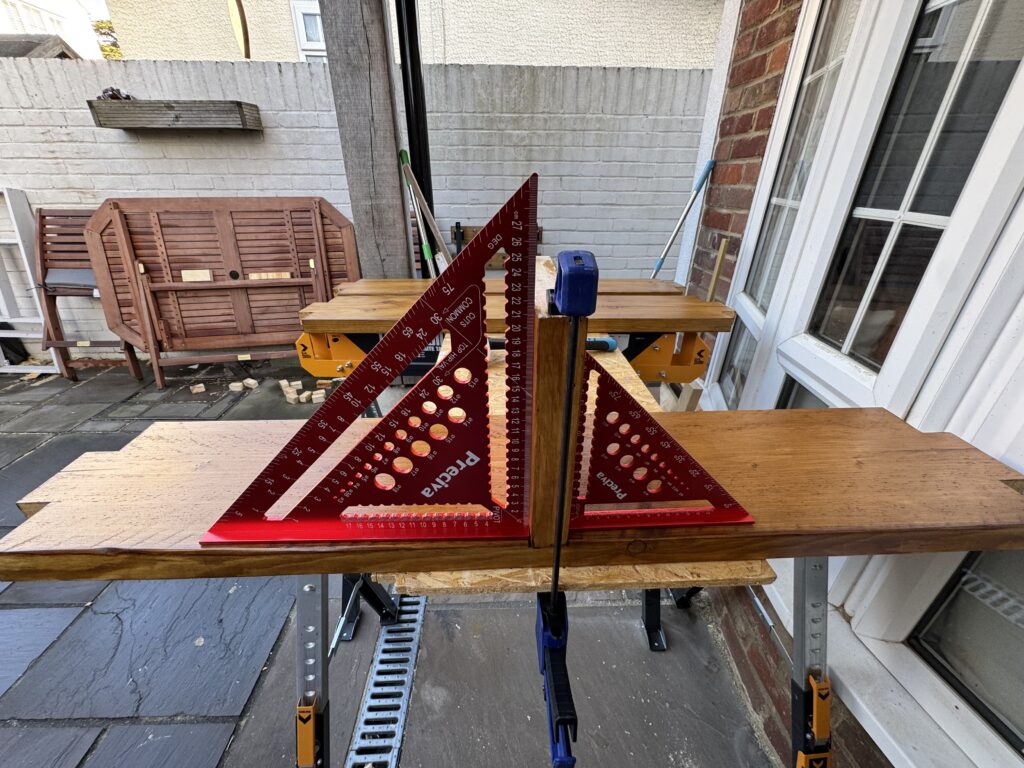
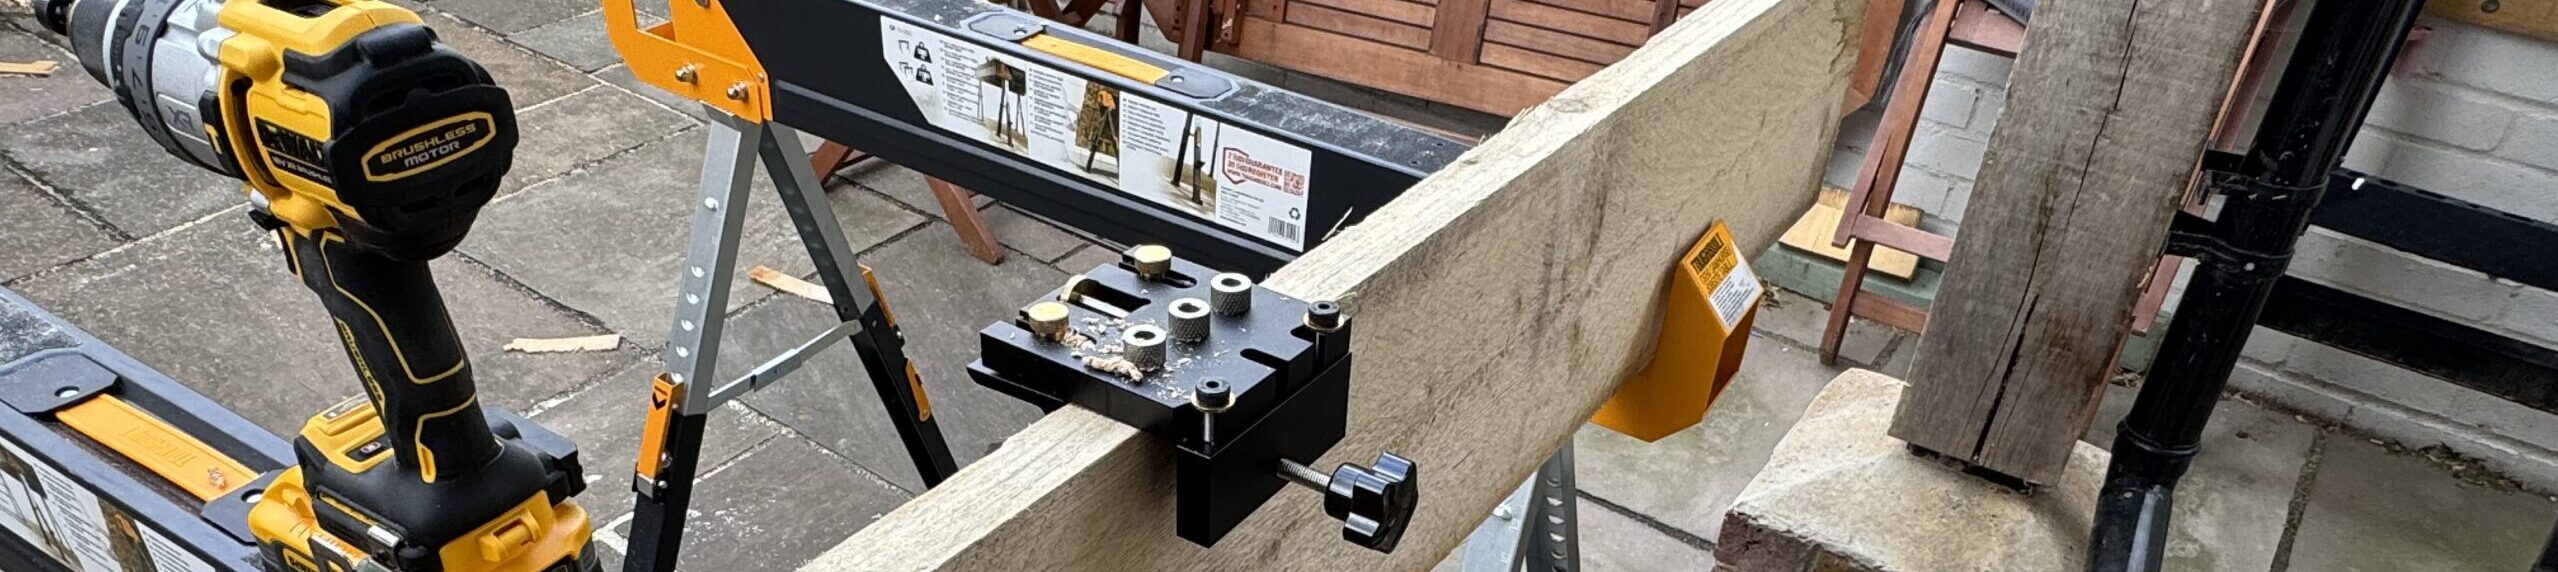
Before I could put the shelving in – I needed to cut some notches (or recesses) on each shelf corner. I have done this loads of times with a number of my other projects and as I gleefully set about the task with my DeWalt Palm jig (and got it done in record time with the cleanest finish above what I have achieved prior). So I was chuffed. Until I slotted the bastards into the frame and realised that I had cut them the wrong way around!
There was a massive gap between the edges of the frame and the notches I had cut … FUCK!
I had two choices:
- Remake the shelving.
- Shorten the width of the frame.
I went for option 2 as that was both the cheapest and less work as it basically meant cutting four shorter length C-16 noggins (at 95mm), sanding them, screwing them in, filling, plugging and then painting (at total of about £0.75p in material cost and 30 minutes in time) – where as re-doing the shelving would probably cost me about £20 in material and a day in preparation … but still FUCK!
Anyhow, I got that sorted out and using the plan above with the two part shelving finally got them onto the frame and secured.
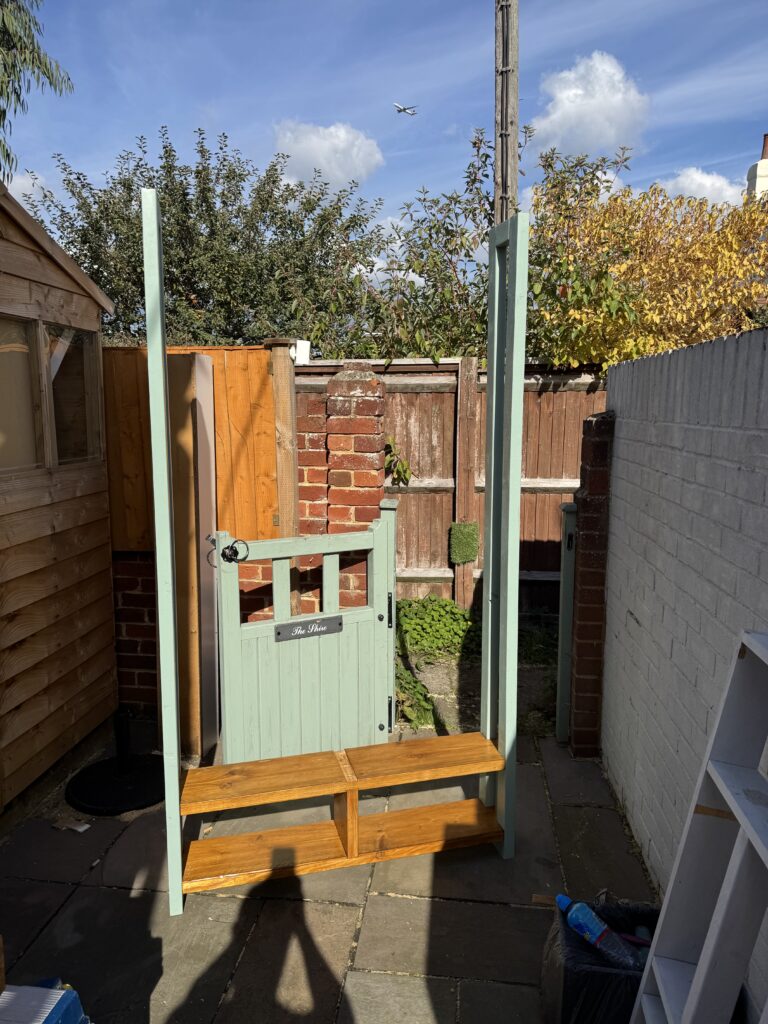
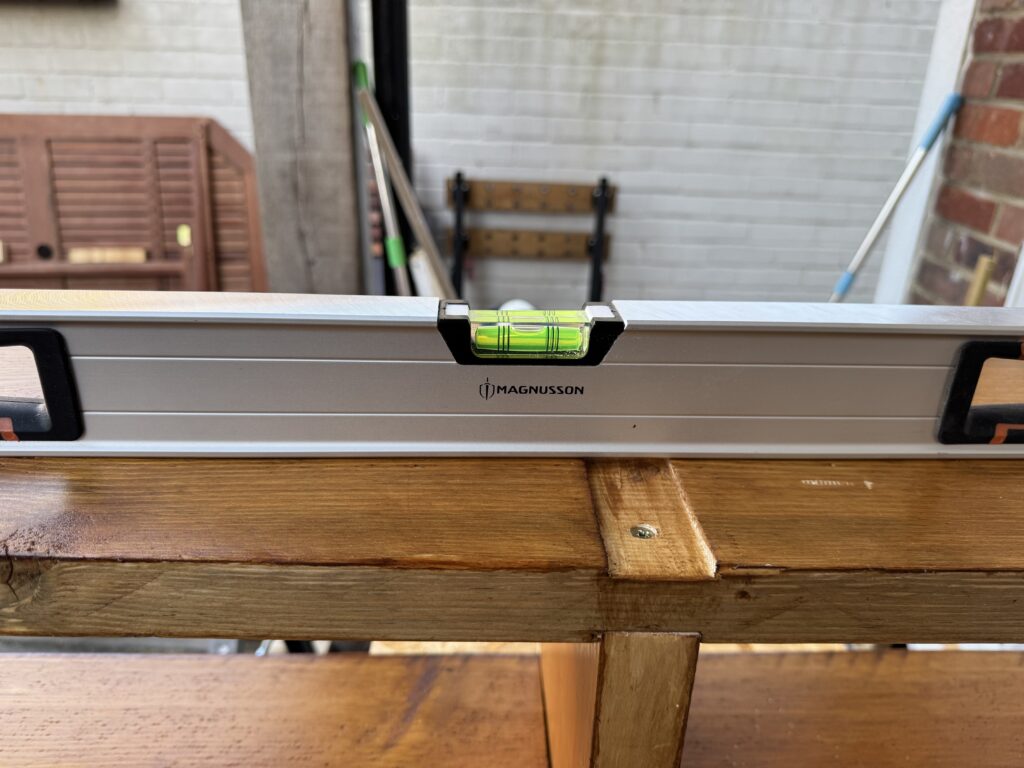
It did cross my mind that by shortening the width of the frame would result in more risk of a “tip” hazard – but – like all tall(ish) shelving it should be secured to a wall with brackets – which had always been my intention – so this wasn’t an issue as when installed it would be anchored.
For those who are really suffering from insomnia – here is some tips around shelving tip hazards:
To prevent shelving from tipping in the UK, always secure it to a wall using suitable fixings, place heavier items at the bottom, avoid overloading, and keep potentially enticing items like toys out of reach of children to prevent them climbing. Regularly check shelves for damage and ensure they are level, as uneven placement or damage can increase instability and risk of tip-overs.Installation & Placement
- Wall Anchoring: Secure shelves to the wall using appropriate brackets and fixings, ensuring the wall can support the load.
- Leveling: Use a spirit level to ensure shelves are perfectly level, as even slight tilts can cause items to slide and unbalance the unit.
- Wall Checks: Before installation, use a pipe and cable detector to check for hidden wires and pipes.
Loading & Use
- Weight Distribution: Place the heaviest items at the bottom of the shelves to lower the center of gravity and prevent tip-overs.
- Avoid Overloading: Never exceed the maximum weight capacity of the shelf; check for signs of bowing or bending, which indicate too much weight.
- Accessible Placement: Store frequently used items at an accessible height, preventing the need to overreach, stretch, or climb.
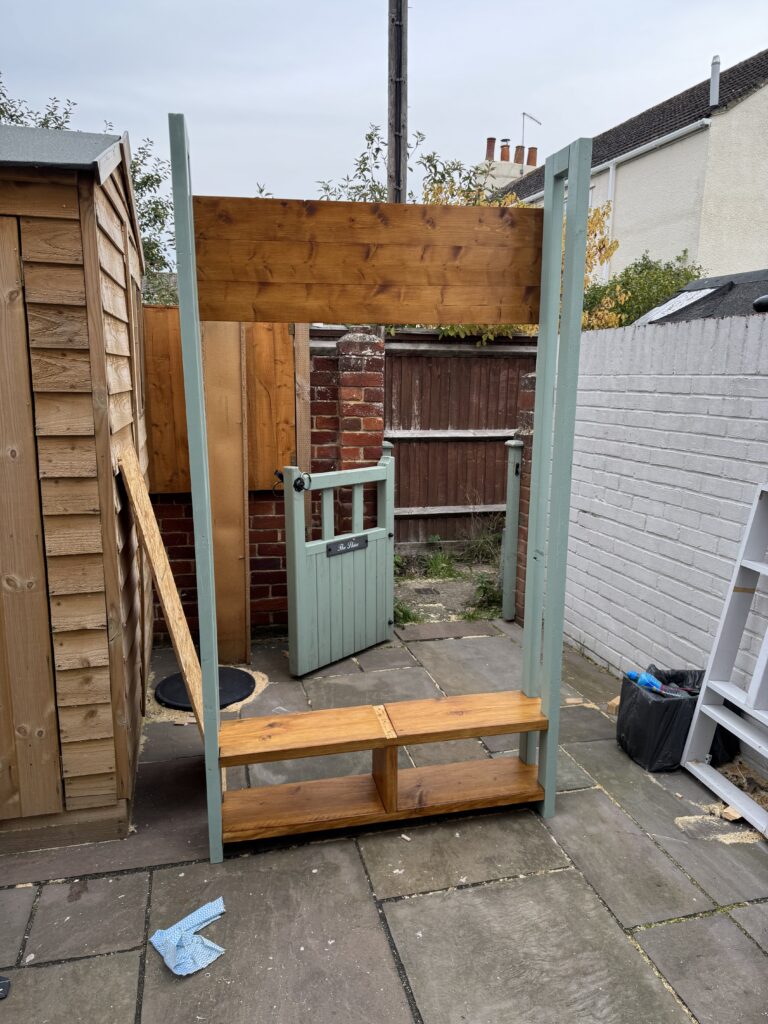
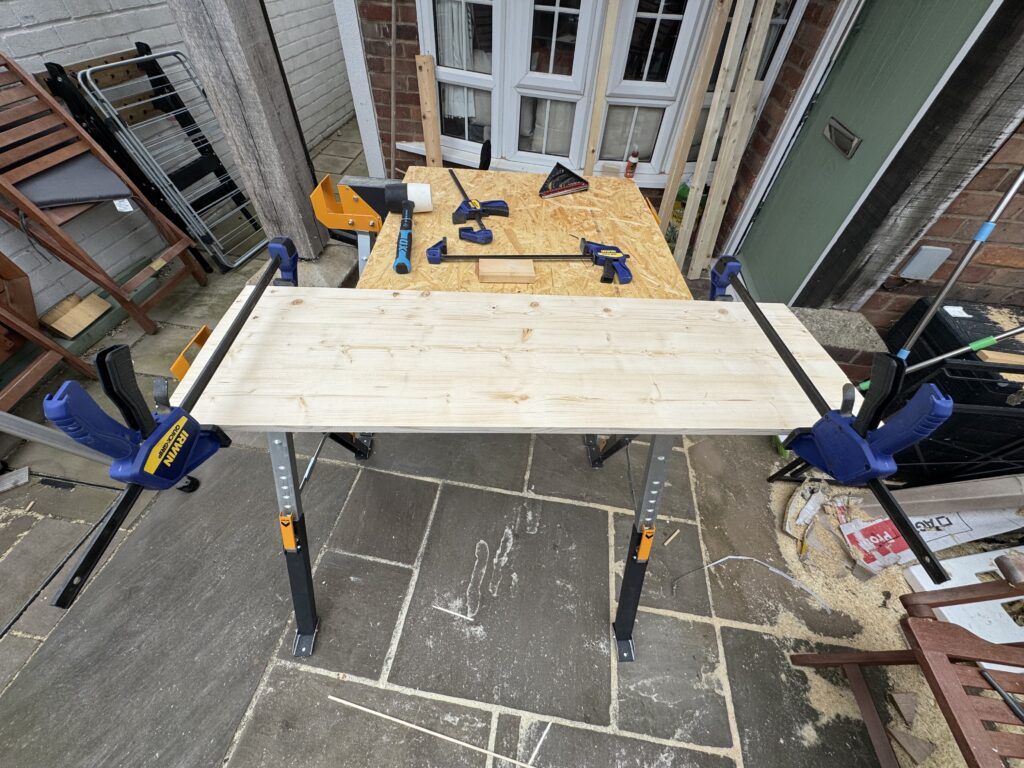
- Attach the backboard
This was simply a joy to do. I was already happy with board – but getting it onto the frame was very simple.
I extended the sawhorses as described in the previous step so the whole thing was stable and using a couple of framing squares got the backboard aligned perfectly at the top of the rack (e.g. not on the “wonk“).
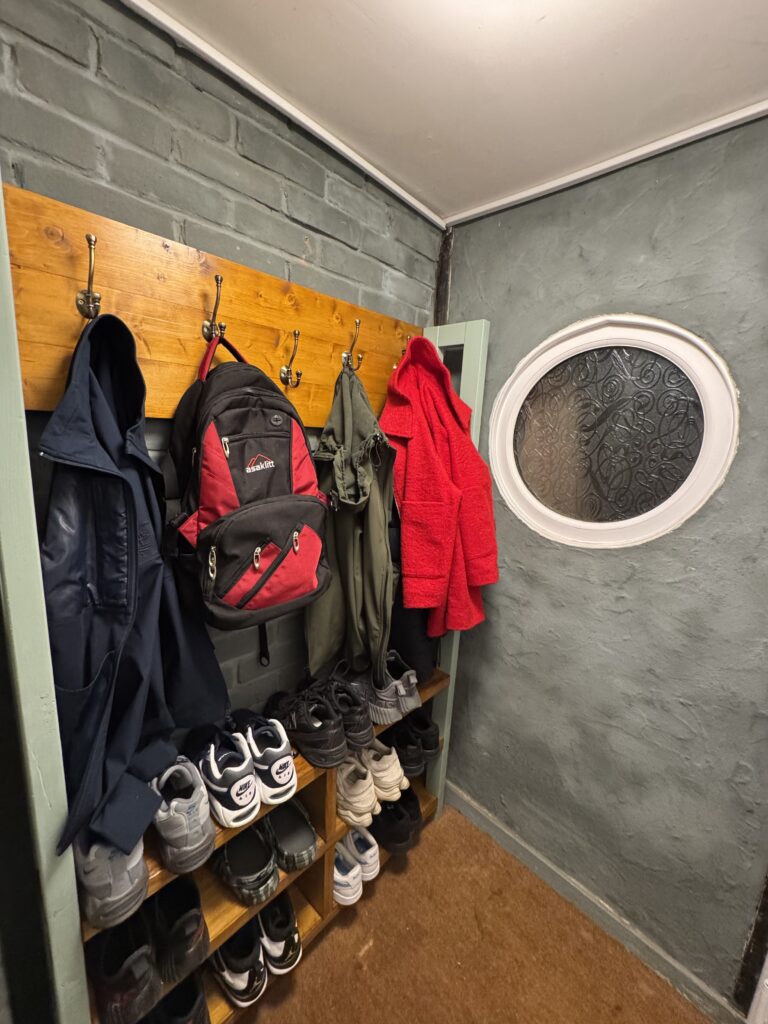
After that it was 6 x 35mm screws to hold it in place. The added benefit of the backboard is that when combined with the shelving it added to the overall strength of the whole rack by bracing it at the top most point (anyone would think that I actually plan this shit). I have to say that after this step it looked sexy. Very sexy! Well, in a way that any coat rack can look attractive!
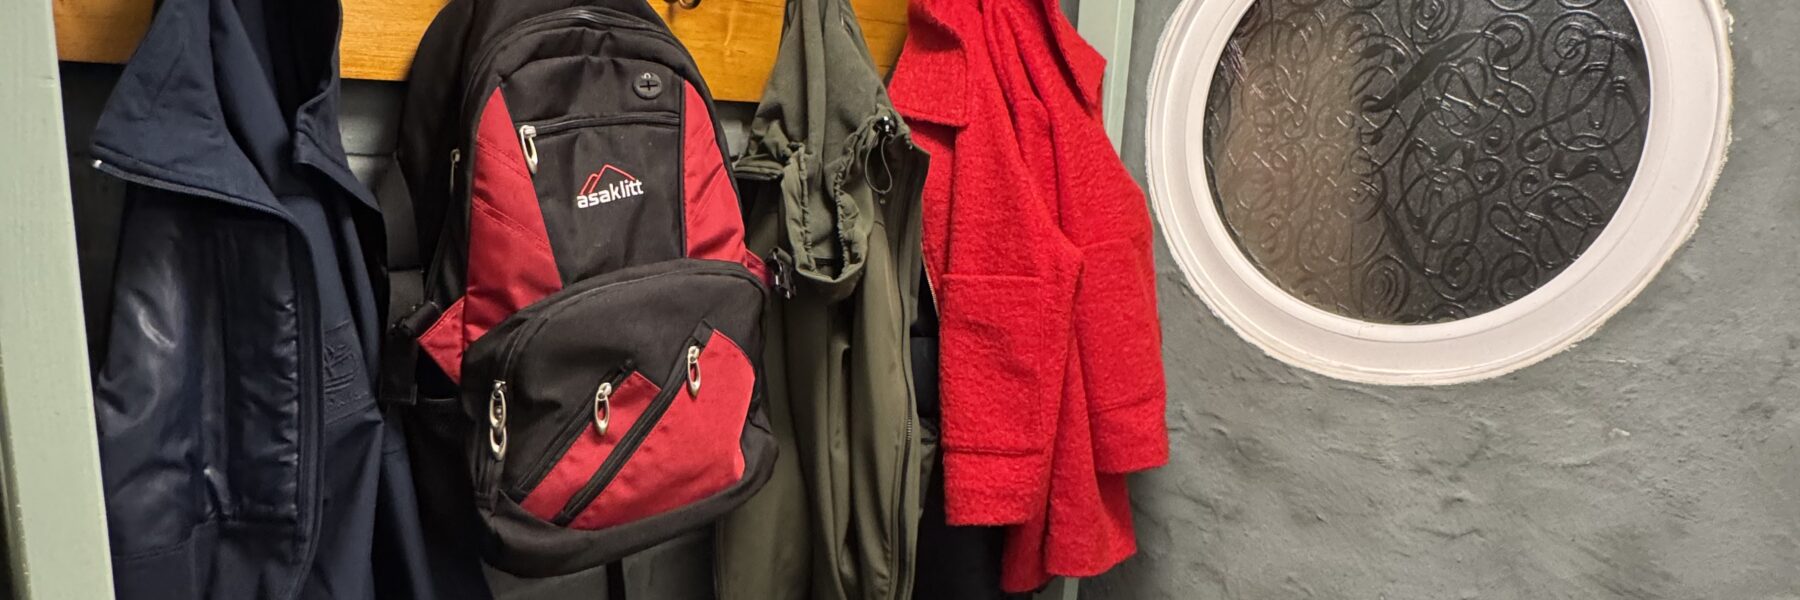
- Add the coat hooks to the backboard and then installation
This was both fun and a chore.
I purchased five of these lovely hooks from Wickes (ignore the idiotic review which calls out missing screws – these come with both screws and Rawl plugs – neither were what I needed, but I believe the product is intended to go into a solid or cavity wall – I was always going to use my own fixings).
With five hooks to fit to the backboard I had the idea that four (two on the left and two on the right) would be level and the center hook would be dropped slightly lower than the other four.
Great idea visually – actually doing that was a paint in the Arse. Especially at 19:00 in October when the sun has gone down and it is dark!
So out came my trusty DeWalt DCL050, meter rule and framing squares so I could mark the lines where the hooks were going to live. Like a mole in sunlight I fumbled around until I managed to get them fitted and I loved the look – and – miraculously they were aligned perfectly!
It was at this point my lad came down from his own personal “man cave” (e.g. bedroom) and suggested that we go grab some food and I have to admit that I was Hank(Marvin (that’s hungry)) – so off we popped to grab some scran (slang for food).
I had intended to call it a day once we got back – but – he went off on a side mission so I got back to the Shire first, so rather than start dinner I decided to clear the shit pit of the porch and install the bugger!
With everything now in place – that was the end of the Shoe and Coat rack project. I am delighted with it. From the original drawings to installation was about a month and I am sure that I have left stuff out – but if you fancy a crack at making something similar drop me a line and I will be happy to help!