Project Specifics:
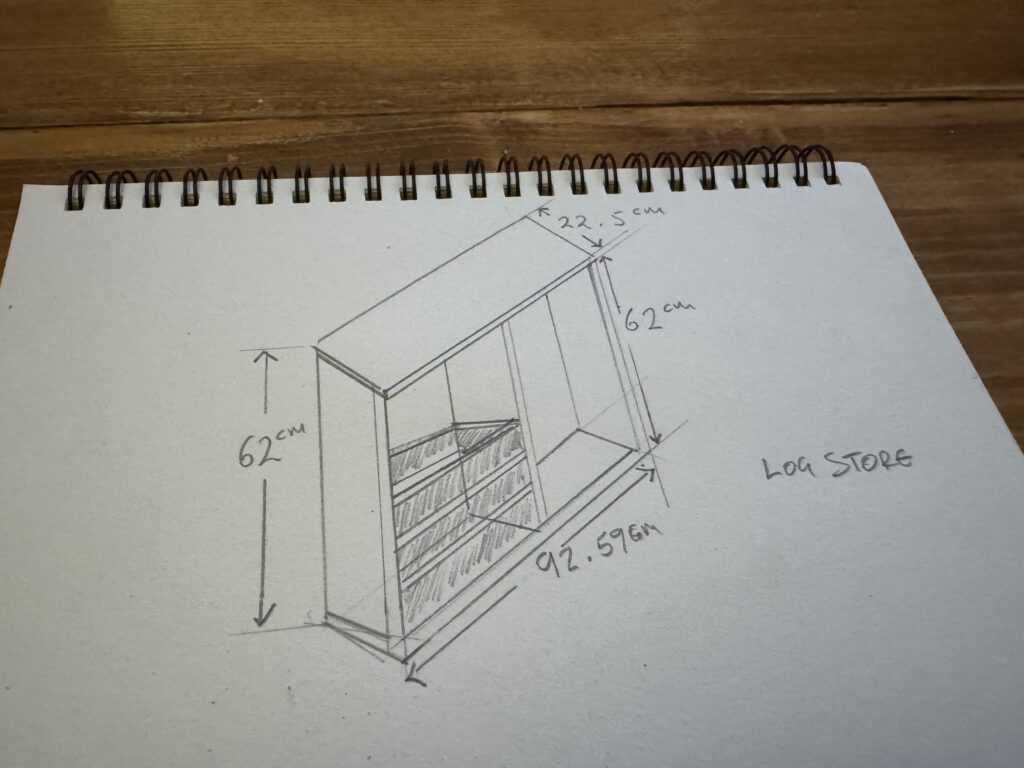
Project Dimensions:
Dimension (W x H x D) | Measurements |
Width | 920.59 mm |
Height | 620 mm |
Depth | 22.50 mm |
Project Costs and Difficulty Rating:
Project Specifics / Unit Costs | Totals |
Difficulty | |
Spruce Boards | £14.06 |
Spruce Slats | £12.00 |
Screws | £7.20 |
Brackets | £9.60 |
Glue | £0.02 |
Stain | £0.30 |
Wax Oil | £0.25 |
Project Total: | £47.63 |
Project History & Detail:
Within the Shire there is a lovely beast of the log burner which I have used every Winter since I moved in to bolster the main heating system that I had installed.
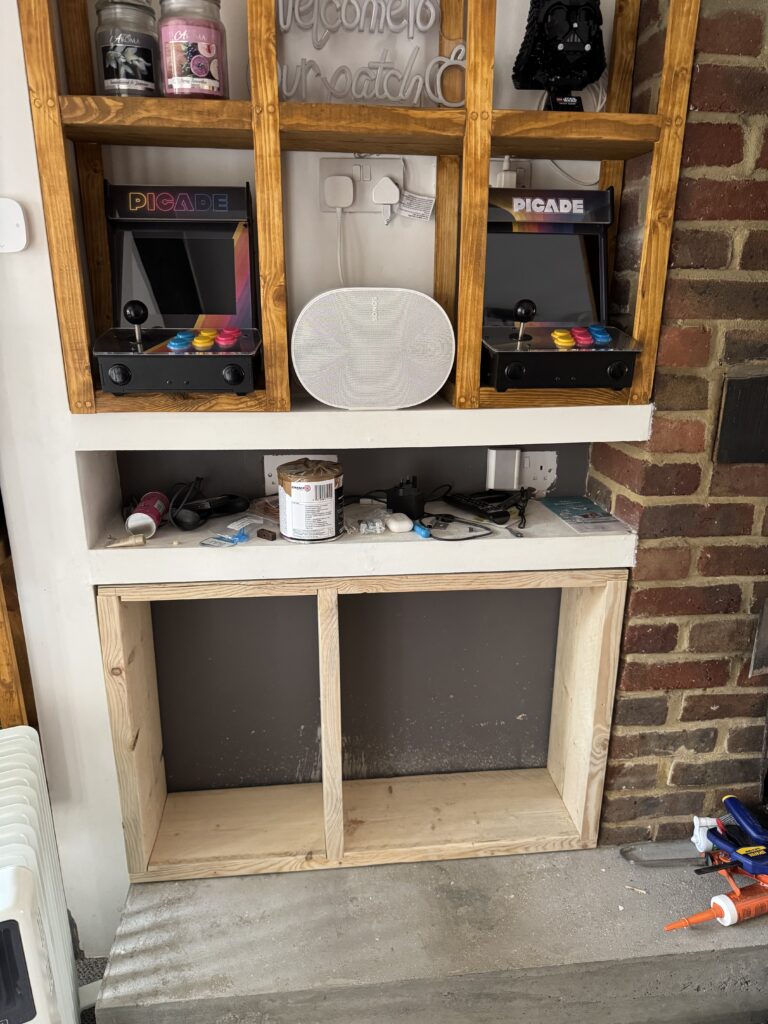
Historically, I store the main supply of logs outside in the shed (or the “Little Shire” as I like to call it) and bring them in when I need them. Once inside I tended to store them in a little recess at the bottom of what is now the entertainment area.
This has worked after a fashion, but was prone to leaving mess (wood chips, and in the case where I used high output heat logs lots of dust). I have thought for a long time about turning that area into a purpose built indoor log store – but given the other struggles that I have had with the Shire it was way down on the priorities list.
However, this Summer has been a very productive one and the Log Store recently made it to the top of my list due to the now close proximity to Winter.
As I often do, I started out by doing a couple of very basic sketches of how I see the project working out. These often change during the “making phase” – I tend to either think of a better way to do something, find out that I don’t physically like what I drew – or – I bugger something up which needs a bit of a re-design on the fly. Also after the initial drawing I tend to then go an measure up the space where the piece is going to live so I know what I am working with and if what I have planned is possible with the actual dimensions I have to play with.
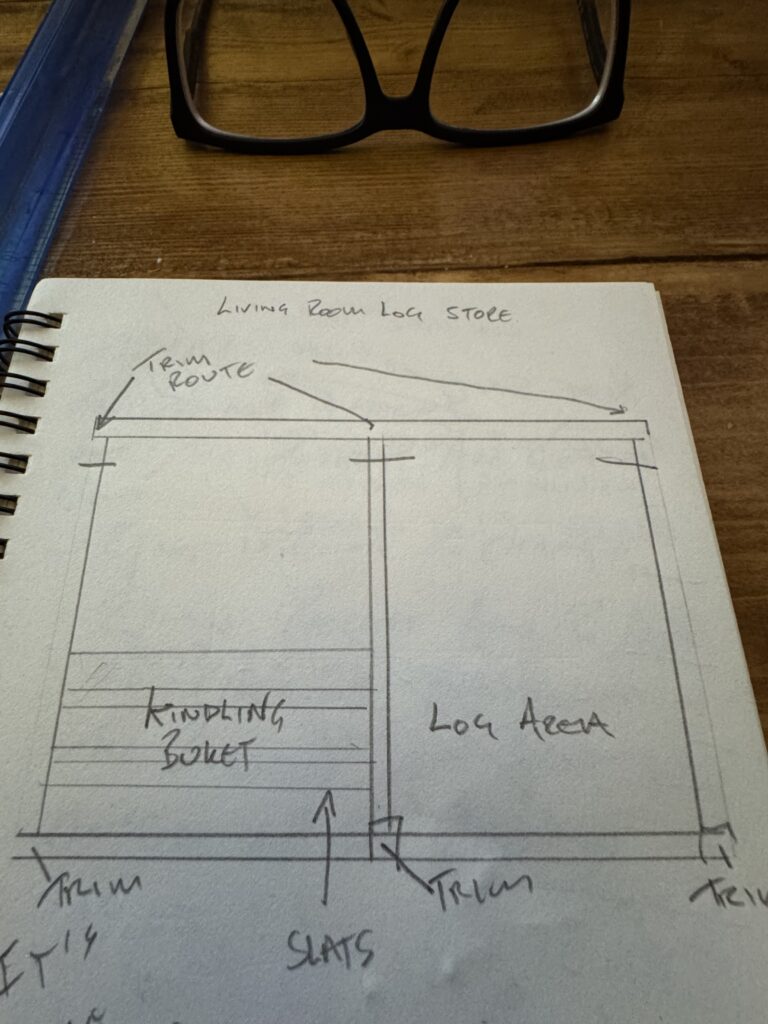
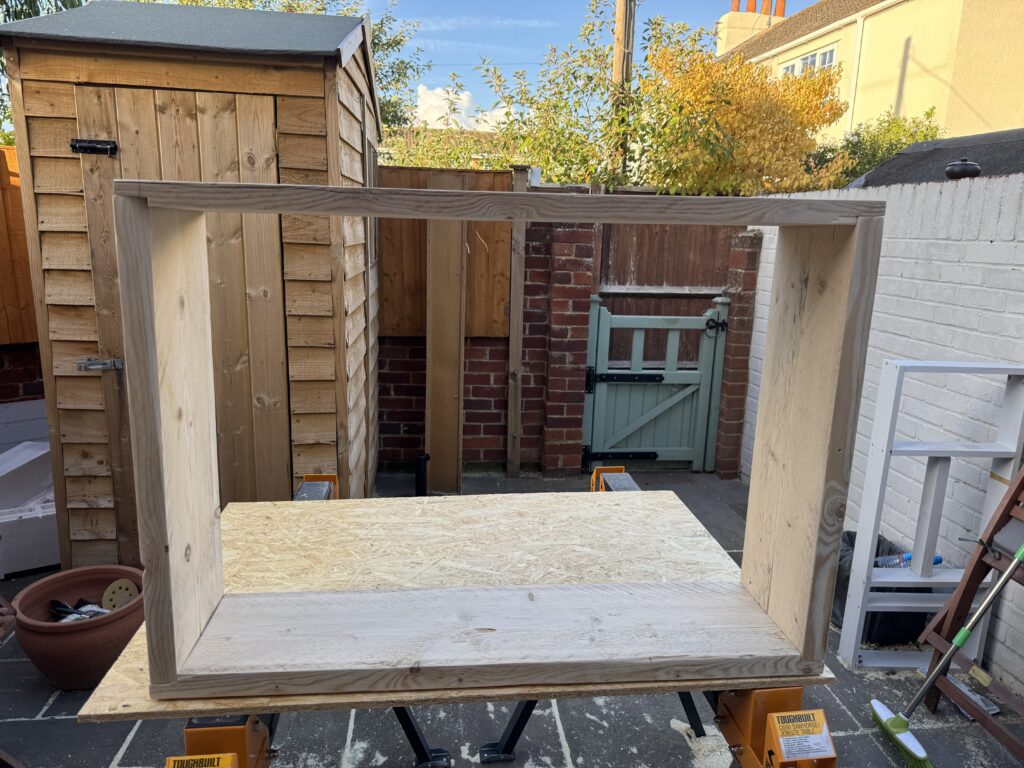
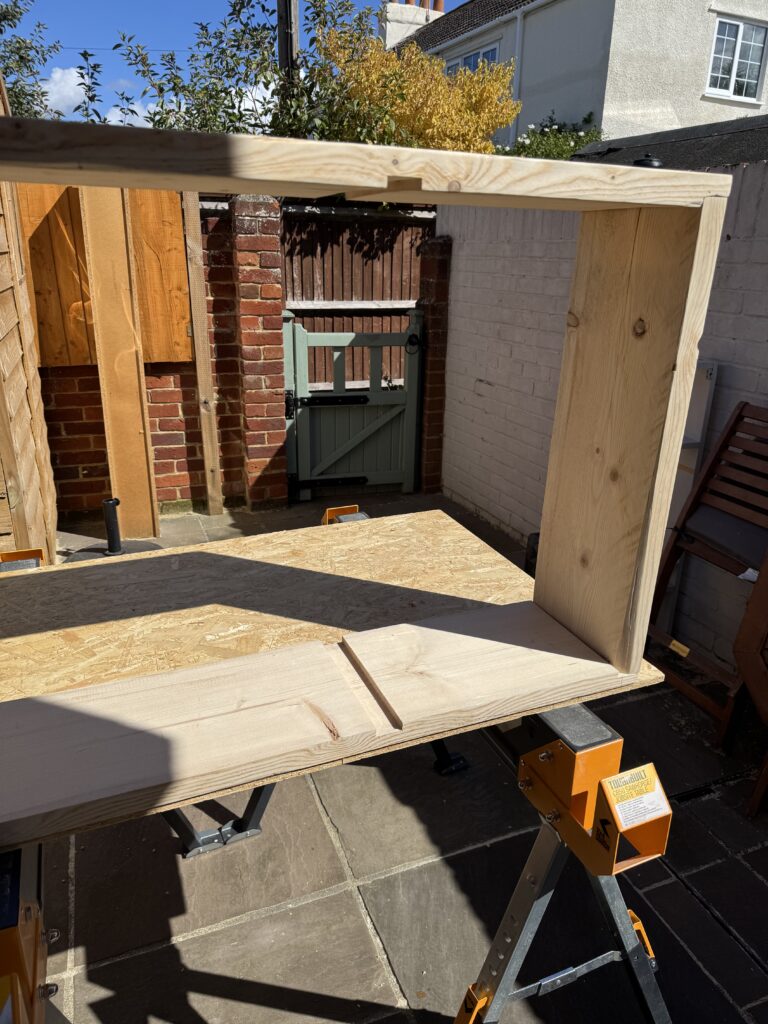
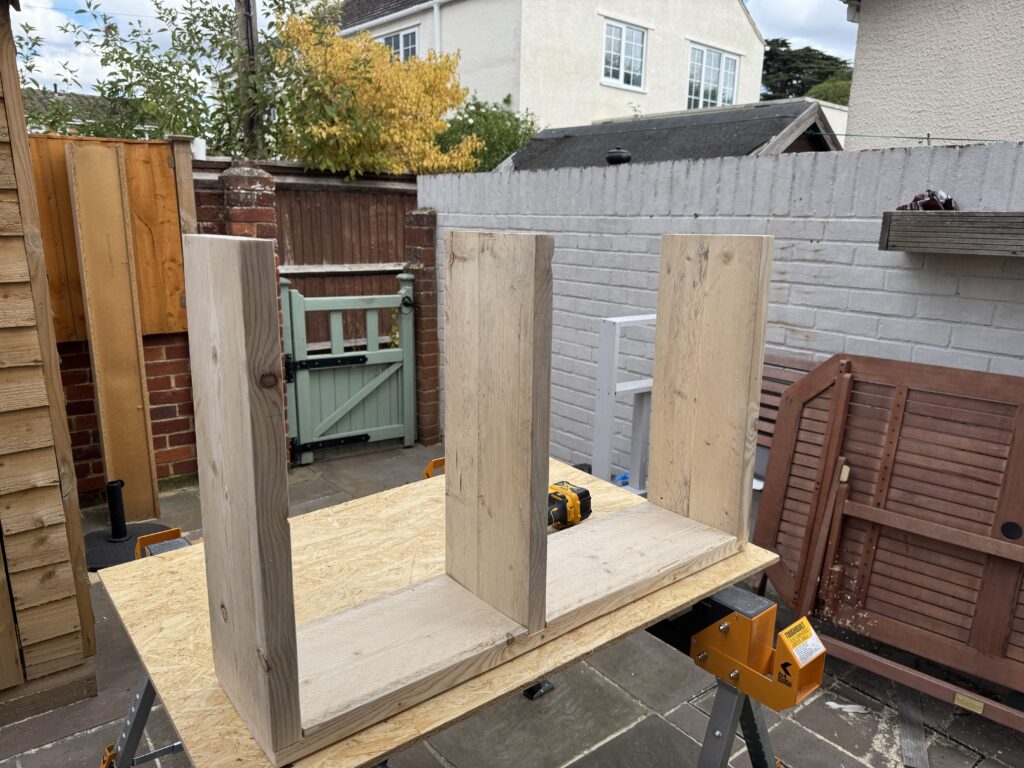
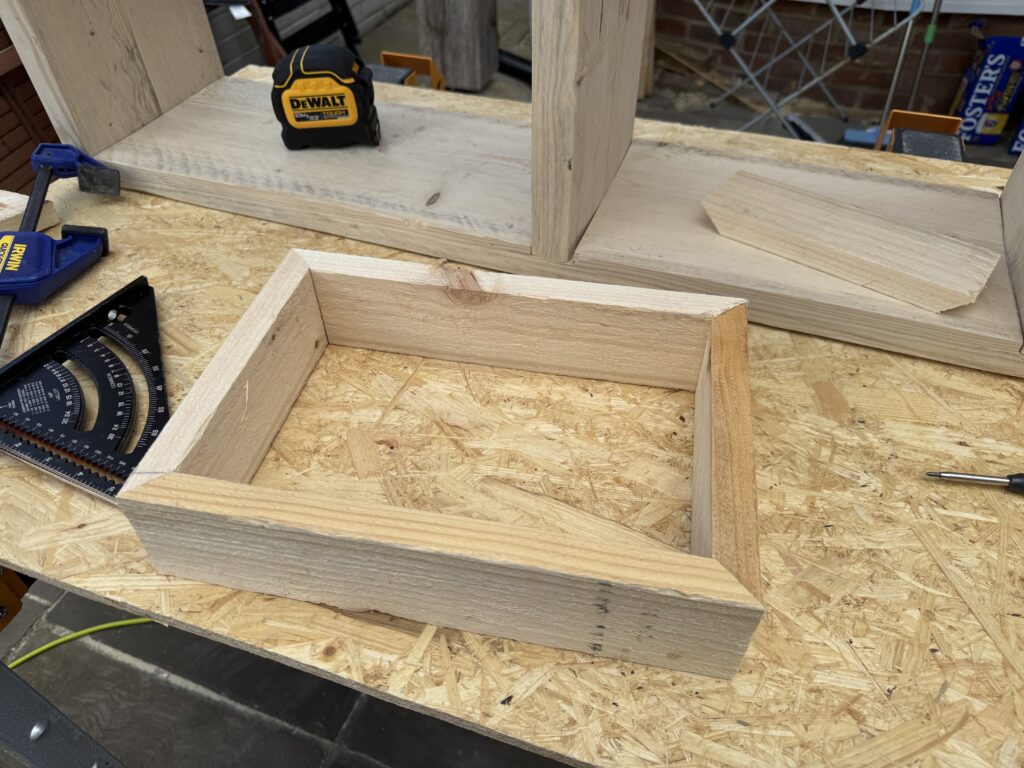
I decided that I was going to split the Log Store up into two different areas – the left hand side being used to store items such as Kindling and the right side being used to store the logs. These two areas would be divided by a length of Spruce board (which is in effect a cut from some reject scaffold board). The separator would be slightly recessed into the frame – which in itself would be a fairly simple rectangular box. The sides of the frame would be again recessed slightly into the top and bottom boards at the edges.
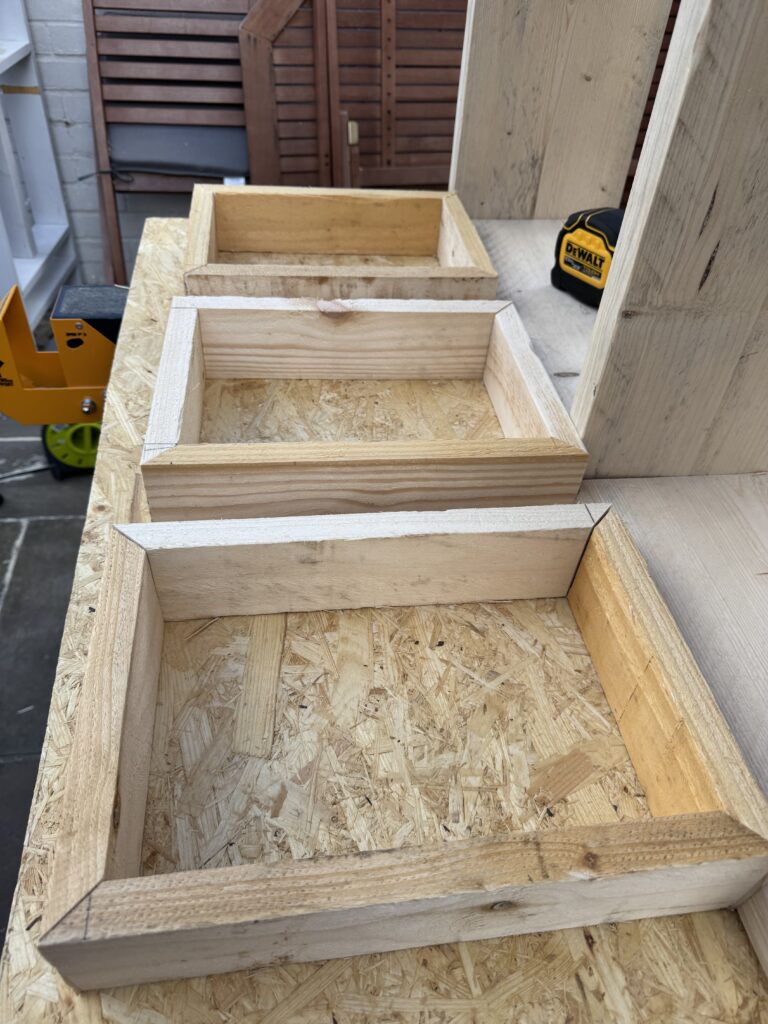
My initial idea for the Kindling section was to cut a number of wooden slats (from some rough sawn Spruce that I had not used on a previous project (or sawed if you are from the US)) and space them out from one another (about 5mm apart) to create a slatted fence effect – but, as my thought process evolved I decided to change these into miter cut boxes which again would be stacked on top of each other with a spacing of around 5mm.
To finish the surface my plan was to stain the frame elements using Osmo Natural Oil Woodstain (Oak 70) and the Kindling boxes with Osmo TopOil (3028) to give a two tone effect on the Unit.
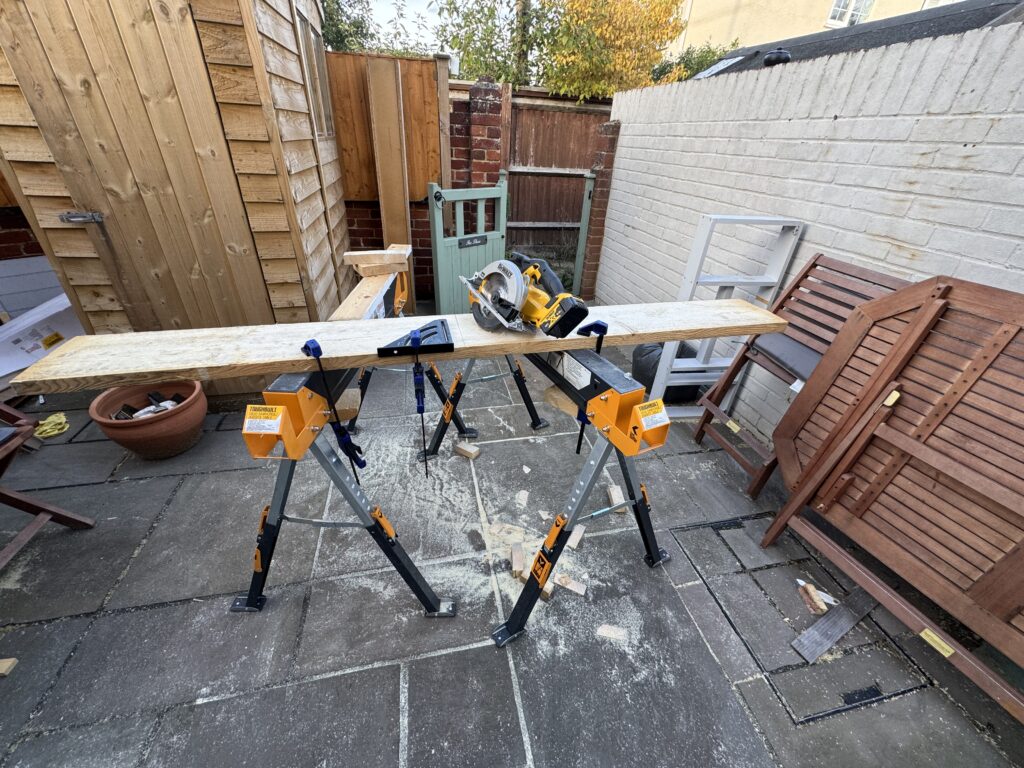
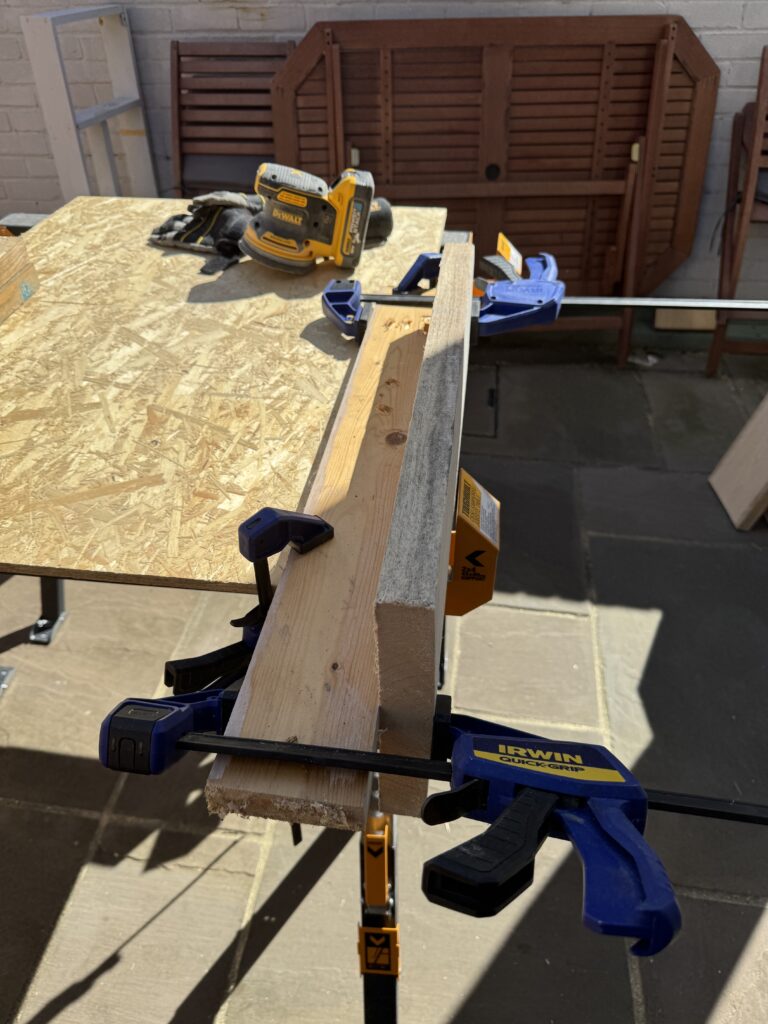
As with most of my projects I started out by cutting the rough timber which would be used for the frame. I did consider using my Miter saw for this, but for practicality at the time I opted for my Circular saw (and I needed the practice with it).
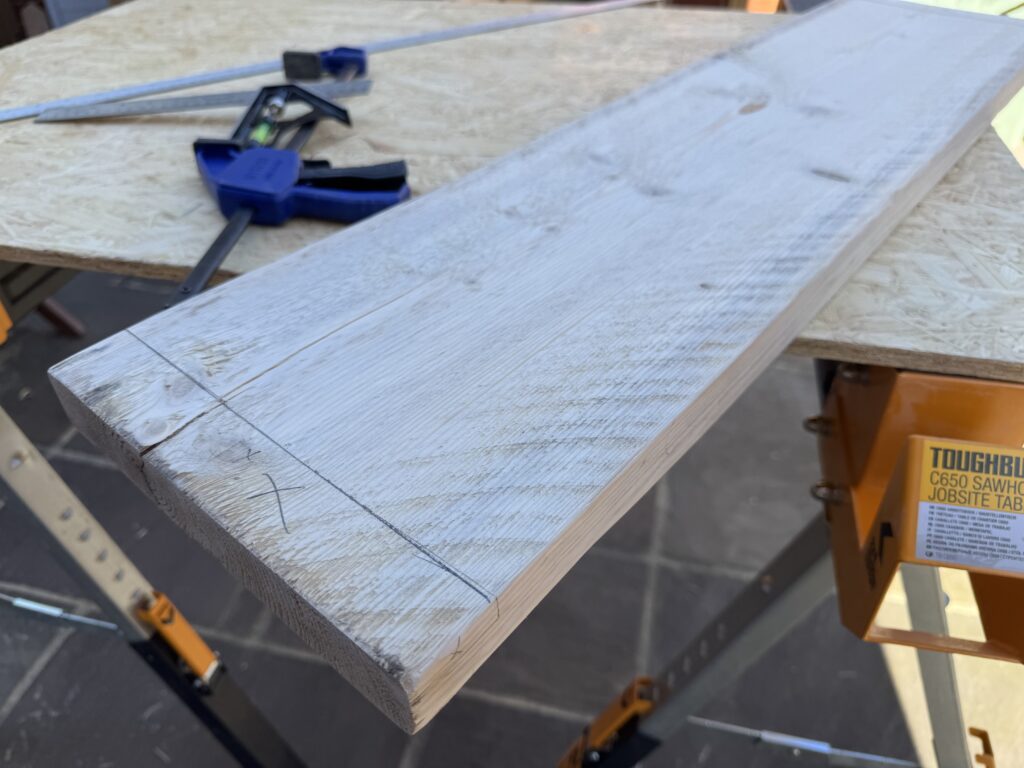
As mentioned, I like to use reclaimed Spruce scaffold boards on my projects. These are often bowed and contain a number of imperfections.
The imperfections are what I love as when they are sanded and stained look amazing – what is less good is the bowing. Where a board has bowed I typically need to plane them down using “the force” (basically eyeball the surface) as various areas of the boards tend to be uneven all over the place.
Once I had cut the and planed the rough frame, I sanded the pieces down using my Random Orbital Sander – starting at 80 grit and then moving to 180 and finally 240 and making sure that I had go most of the damage out which electric planing causes.
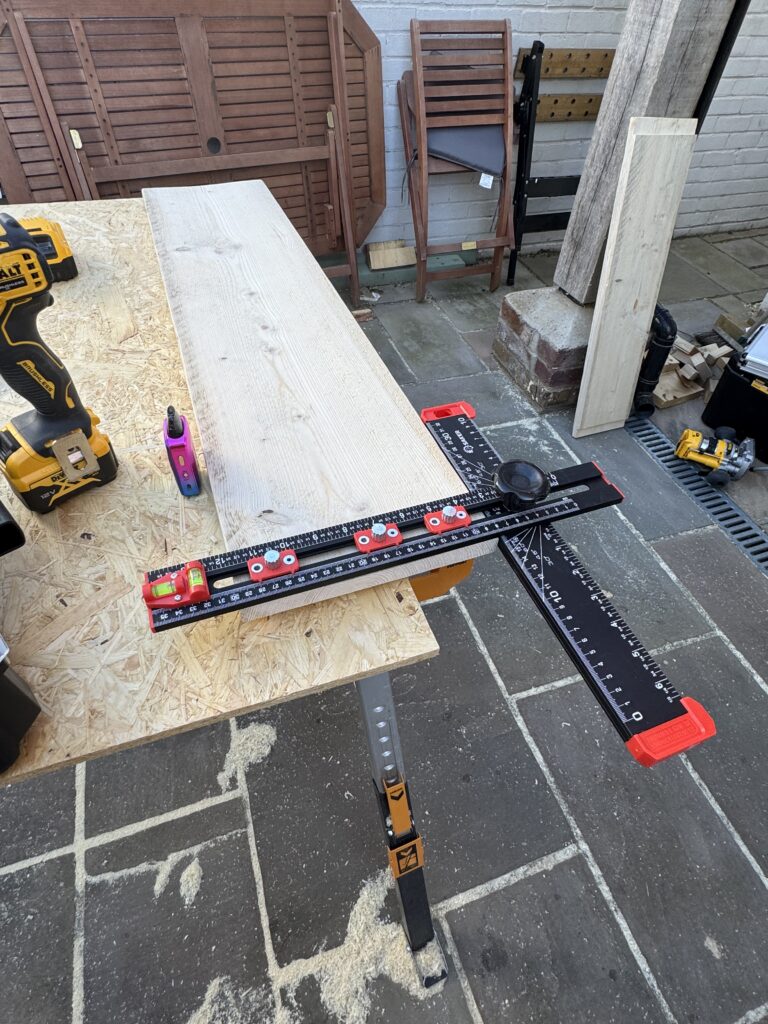
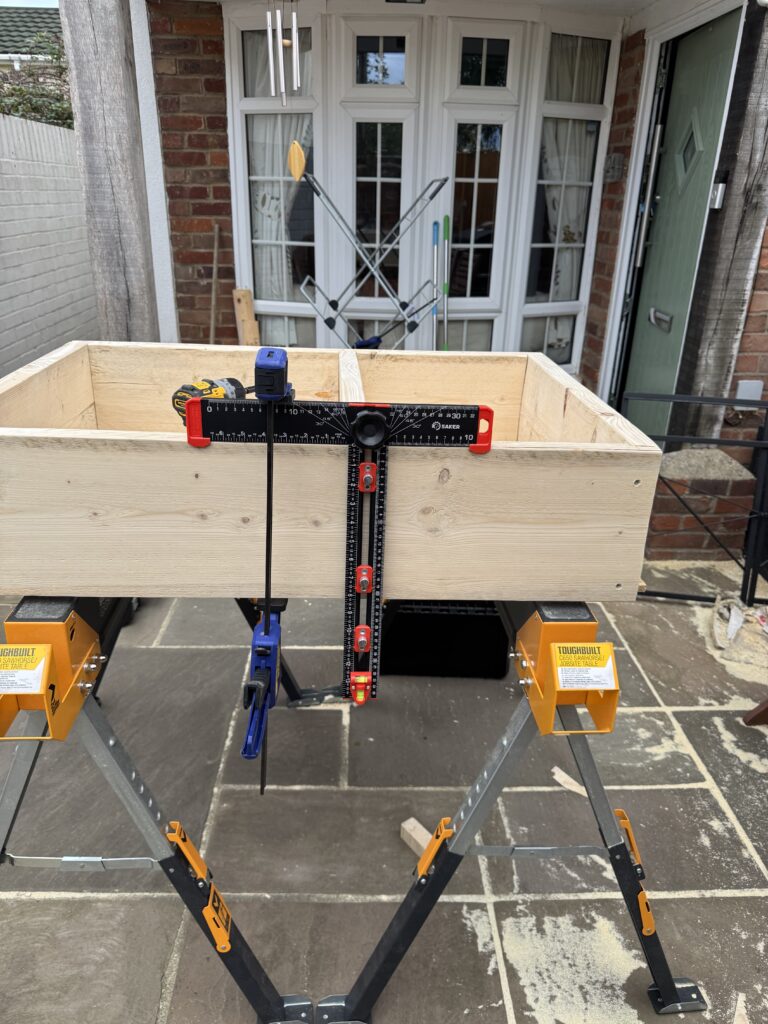
It was at this point that I was ready to Trim route the recesses on the left, middle and right elements of the top and bottom parts of the frame. I didn’t need to make these deep into the wood – I was looking at about 5mm maximum.
To ensure that each routed section lined up between the top and bottom before I routed I placed the pieces side by side, edge to edge and marked with a pencil the width of the board, which give or take is about 36mm (it does vary per board – which is entertaining!).
I then set up a very simple guide rail using some off cut timber that I could run the Trim router in-between to ensure that the routes were consistent.
Something that I should point out about a Trim Router – It doesn’t matter if you are using it in Plunge or Trim mode – bring your material down a few millimeters at a time. It is time consuming – but – you will reduce stress on the cutter and lower the tools disposition to run away from you along the grain (basically the tool “jumping“).
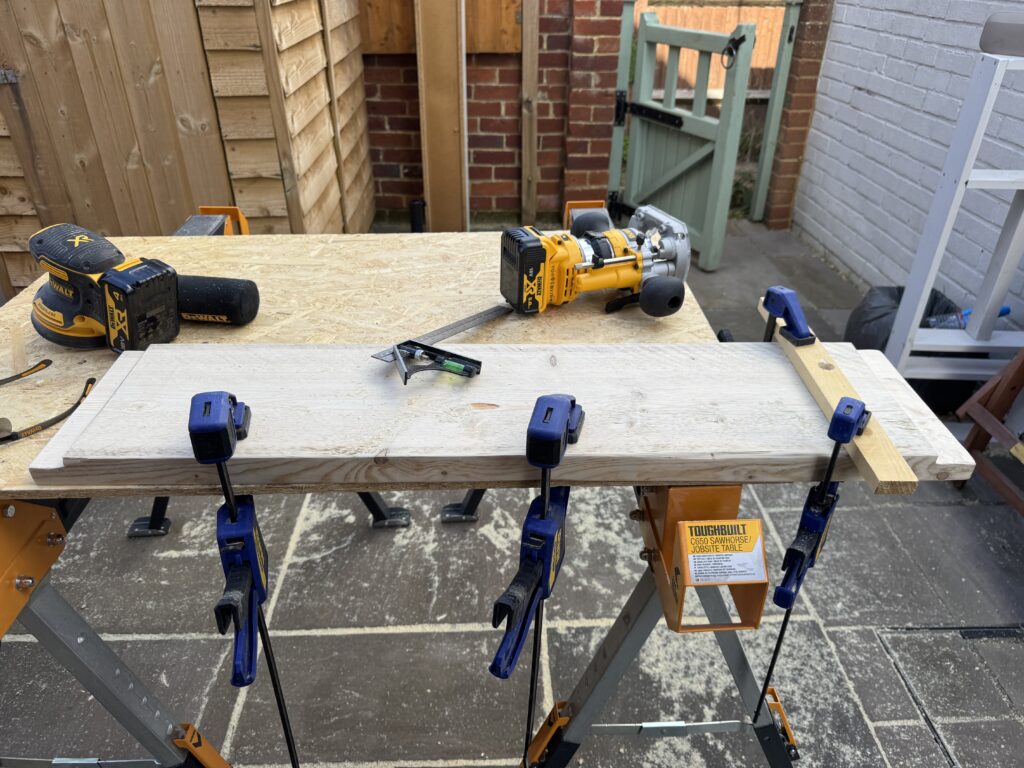
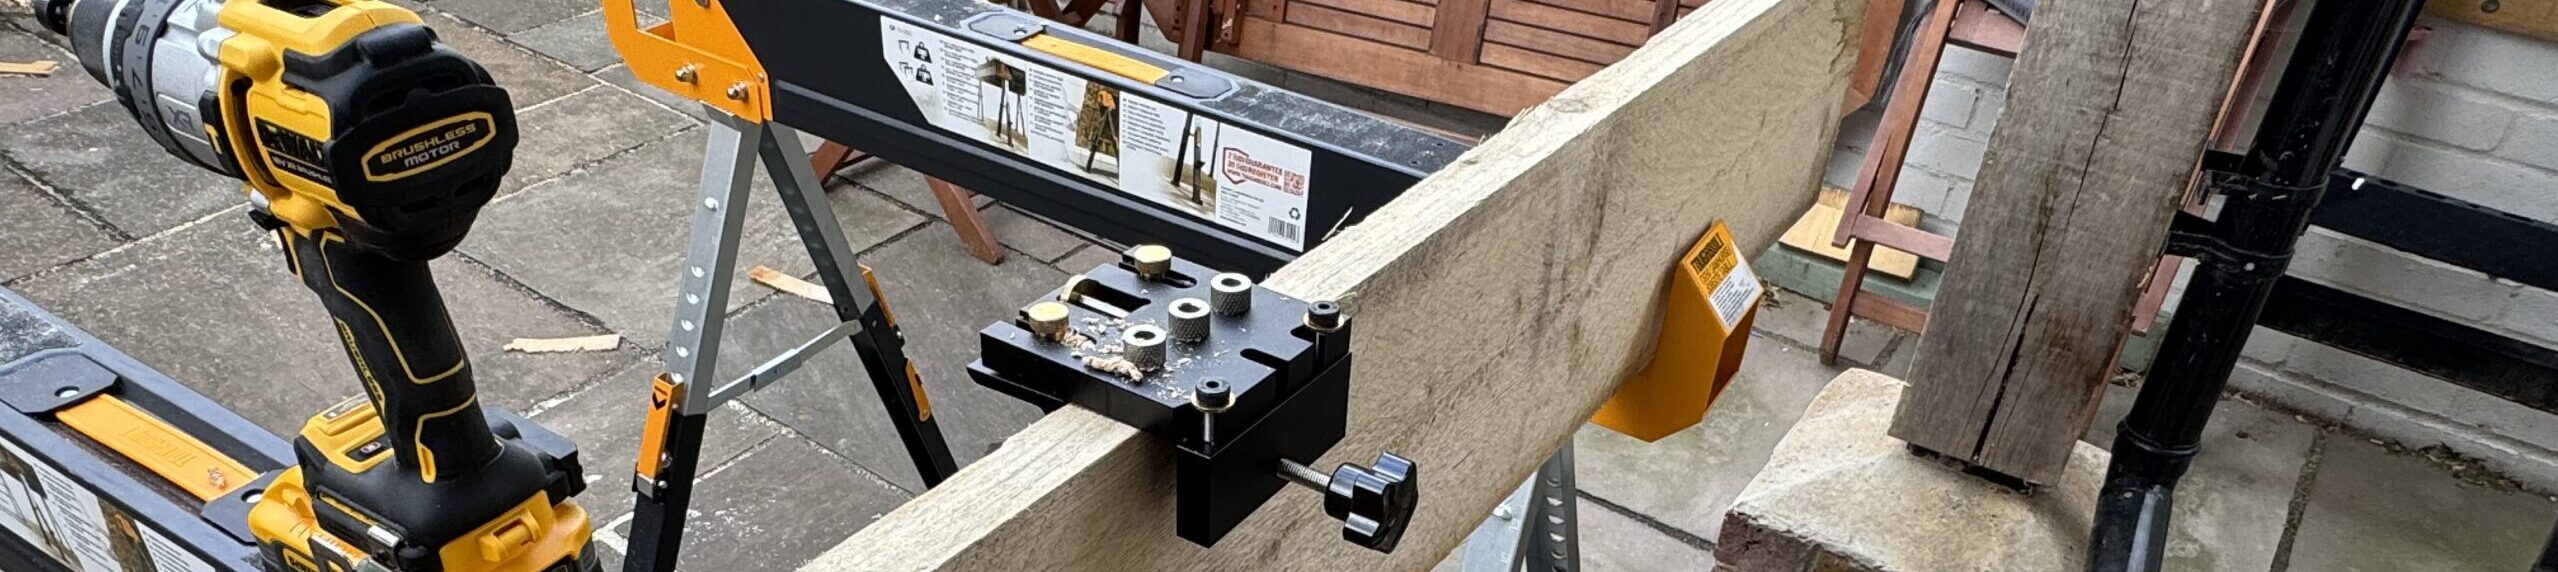
Once I had trimmed the material it was onto fixing the frame together – this was pretty simple with the only part really needing some thought was drilling the pilot holes using the Saker jig and perhaps the rubber mallet for some gentle “encouragement” to fit together.
By this point I was midway through day 2 of the project and it was approaching around 16:00 so I did procrastinate a little in regard to if I could be arsed to cut, sand and then assemble the Kindling boxes – but I then gave myself a kick up the backside as I knew that it might be a little while before I could get a chance to continue the project.
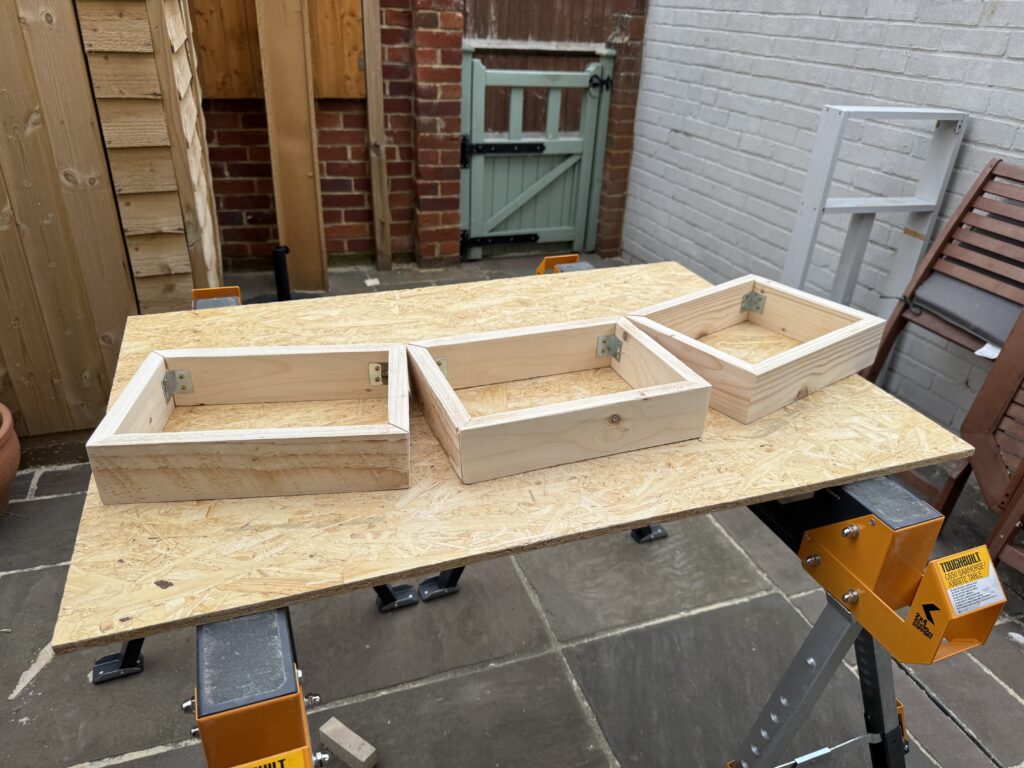
As mentioned earlier I had some lovely rough sawn slats of Spruce that I bought a lot of for a previous project but only ended up using a very small amount. So I miter cut these to size, sanding them down (using the same grit progression that I used for the frame) and then using some metal wall mounting brackets that I also had laying around for a previous project fixed them together with some wood glue along the mitered edges.
I did consider a more fancy join for these – but:
- It was late.
- I really couldn’t be arsed – my hands, wrist, feet and head were hurting – plus I had sawdust in just about every crevice you can think of so I wanted this to be over!
- Oddly enough, whilst the easier option – the brackets actually looked quite cool with the wood!
So with those joined it was time to call it a day on part 1 – in the next part I will cover the installation of the Kindling basket, the staining and fitting into place in the living area.
Tools Used on the Project:
Tools | Purpose | Model / Product |
Drill Driver | Drilling pilot holes for the screws and then driving those in to place. | |
Electric Planer | Where the reclaimed boards were uneven, These were planed to flatten the surface. | |
Electric Mitre Saw | Used to cut the miters on the slats for the Kindling basket. | |
Palm Jig Saw | Used to tidy up cuts from the Circular Saw. | |
Trim Router | Used to cut the channels in the wood for the frame boards. | |
Orbital Sander | Used to take the timber from 80g to 180 and then finally 240. | |
Chisels | Used for cleaning up the Trim Cuts. | |
Rubber Mallet | Used for fitting the shelf and frame into position without leaving dents in the wood. | |
Circular Saw | Used for cutting the frame boards to the correct size. | |
Irwin Clamps (x 4) | Used to clamp down material being worked on. Also used to hold material in position and level when being joined. | |
Speed Square | Used to make sure that the frame and the basket elements are square before and after joining. | |
Spirit Level | Used to make sure that the unit is level (kind of obvious really - I can't make this sound sexy or technical). | |
Drill Hole Positioning | Used to make sure that all the pilot holes for the screws are consistent in being lined up and level. | |
Saw Horses | Used as the main base to support all the materials whilst being worked on. |