
Project Specifics:
Project Dimensions:
Dimension (W x H x D) | Measurements |
Width | 655 mm |
Height | 1700 mm |
Depth | 210.05 mm |
Project Costs and Difficulty Rating:
Project Specifics / Unit Costs | Totals |
Difficulty | |
Spruce Boards | £18.75 |
Sawn Frame Timber | £5.00 |
Screws | £2.88 |
Stain | £0.30 |
Project Total: | £26.93 |
Project History & Detail:
As the main work to the kitchen was almost over (and I was pretty bored of it by this point) – I decided to purely refocus I’d turn my attention (for the first time) to some work which added some value to my little cottage (well, I say value – not of the monetary kind – the kind where I could look at something and smile).
In the main living space I have a feature window which, pretty much since I moved in has been a general dumping ground for tools, materials and any other level of shite that I could cram into the space that didn’t fit anywhere else. I had always thought that it could be something very restful to chill in and perhaps read a book – or – more aligned to my living habits have a cheeky snooze.
Within this area was an absolutely horrible Ikea shelving unit that wasn’t properly secured to the wall, had no depth whatsoever (so, you couldn’t get anything beyond a Ladybird book to fit – which, some folks who know me might say is about my level of reading) Which was yet another present for me to eventually fix from the previous owner of my Shire.
Below is a shot of the living space before the work – I know that it actually looks kinda good, but it’s a bit of a cheat really as prior to this photo (which was on a tidy up day) it looked like a beach on D-Day!
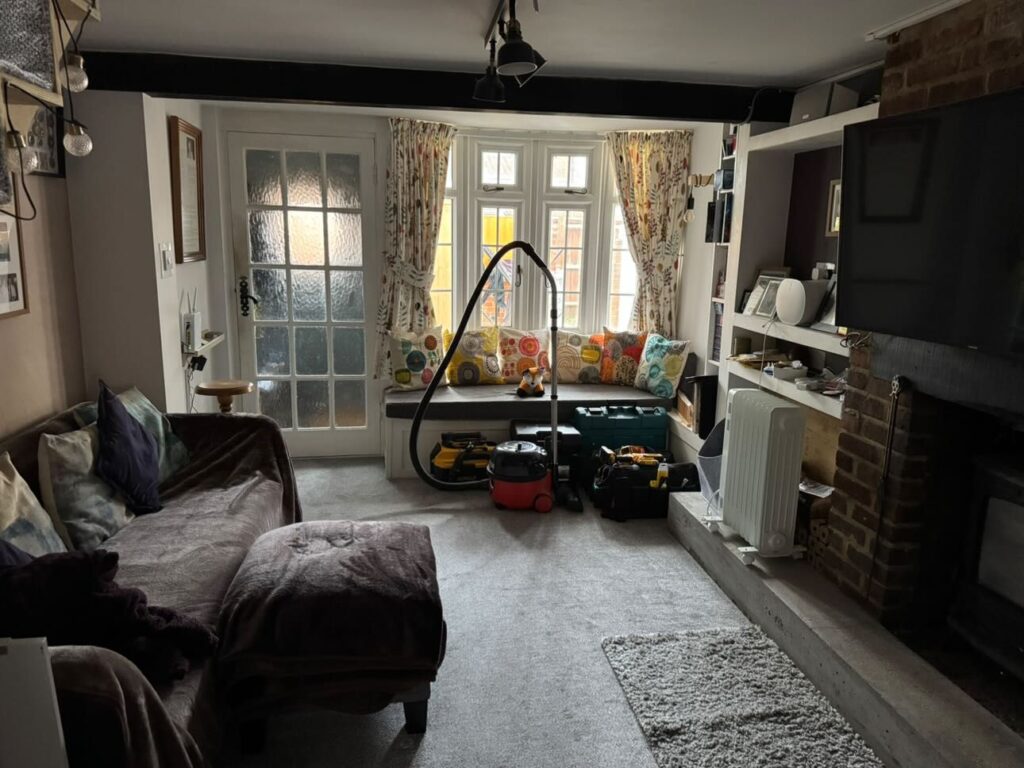
If you look at the picture above – you can see the horrendous Ikea shelf located at the back far right hand side.
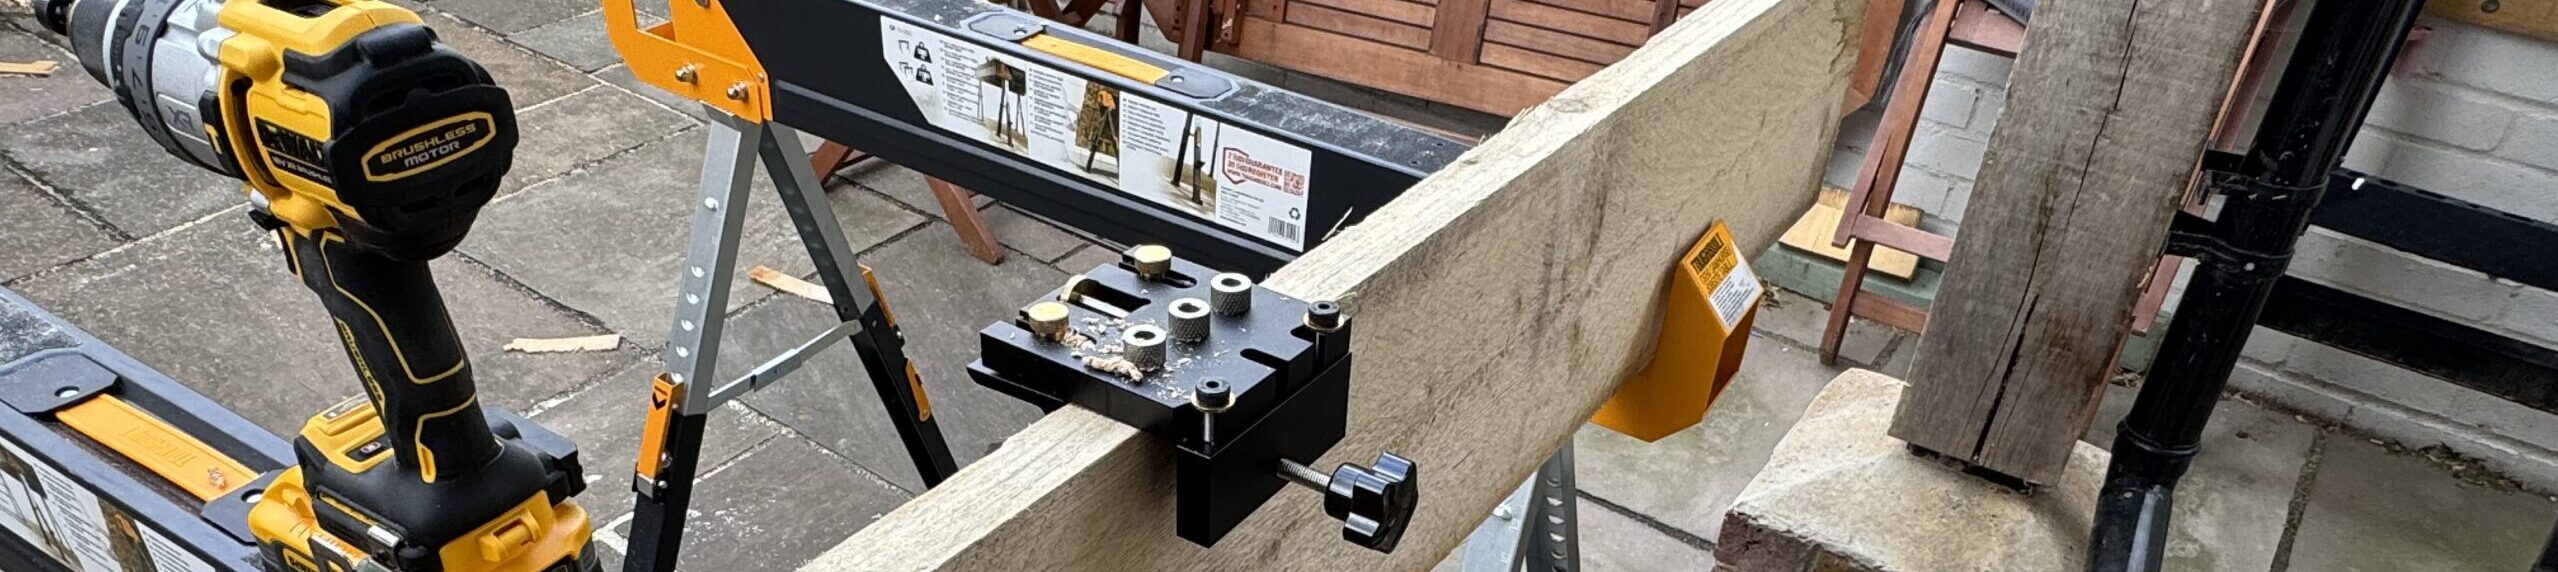
Tools used on this project:
Tools | Purpose | Model / Product |
Drill Driver | Drilling pilot holes for the screws and then driving those in to place. | |
DeWalt Combi-Drill | Used for drilling pilot holes for the frame and shelves. | |
Electric Planer | Needed to slightly plane the top of the bookshelf as the ceiling wasn't level. | |
Electric Mitre Saw | Used as a chop saw to ensure accurate cuts for the frame and shelves. | |
Palm Jig Saw | Used to the cut the notches on the shelves so they could fit in the frame. | |
Orbital Sander | Used to take the timber from 80g to 180 and then finally 240. | |
Rubber Mallet | Used for fitting the shelves into the frame without leaving dents in the wood. | |
Irwin Clamps (x 6) | Used to clamp down material being worked on. Also used to hold material in position and level when being joined. | |
Speed Square | Used to make sure that the frame and shelves are square before and after joining. | |
Spirit Level | Used to make sure that the unit is level (kind of obvious really - I can't make this sound sexy or technical). | |
Saw Horses | Used as the main base to support all the materials whilst being worked on. |
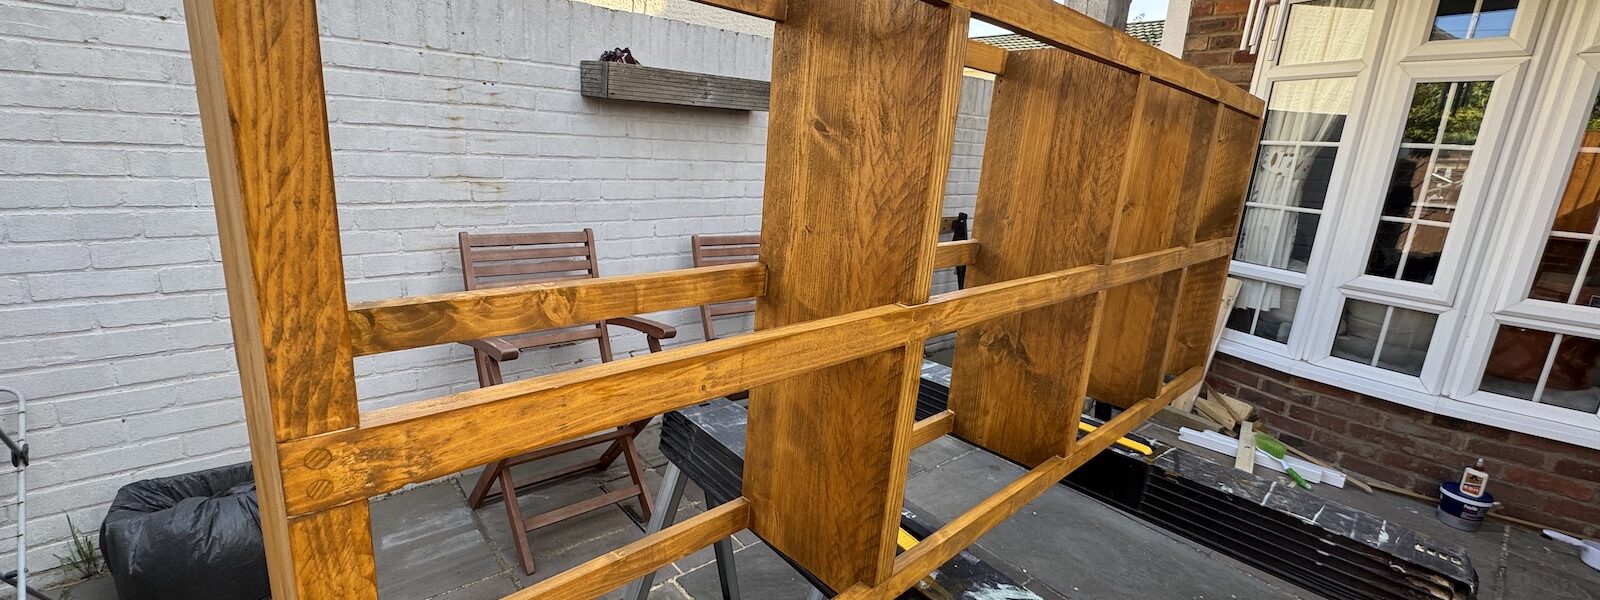
In the next part of this series I will cover the making of the bookcase and it’s installation in the living room.