Project Specifics:
Project Dimensions:
Dimension (W x H x D) | Measurements |
Width | 1100 mm |
Height | 350 mm |
Depth | 210.05 mm |
Project Costs and Difficulty Rating:
Project Specifics / Unit Costs | Totals |
Difficulty | |
Spruce Boards | £18.75 |
Screws | £2.88 |
Stain | £0.30 |
Project Total: | £21.93 |
Project History & Detail:
So after I had made the coat and shoe rack – which you can read all about here and here whilst I loved it and it has really made a difference something was bugging me.
Something that I left out of the original posts I made another boob with the height of the unit. Basically, if I had been able to get it into the porch without having to lay it on its side it would have fitted perfectly.
But, I couldn’t as it was too long to get it upright due to the low ceilings of the Shire – so that resulted in me having to cut the frame down taking about 35cm – which was a little bit of a personal trauma I can tell you!
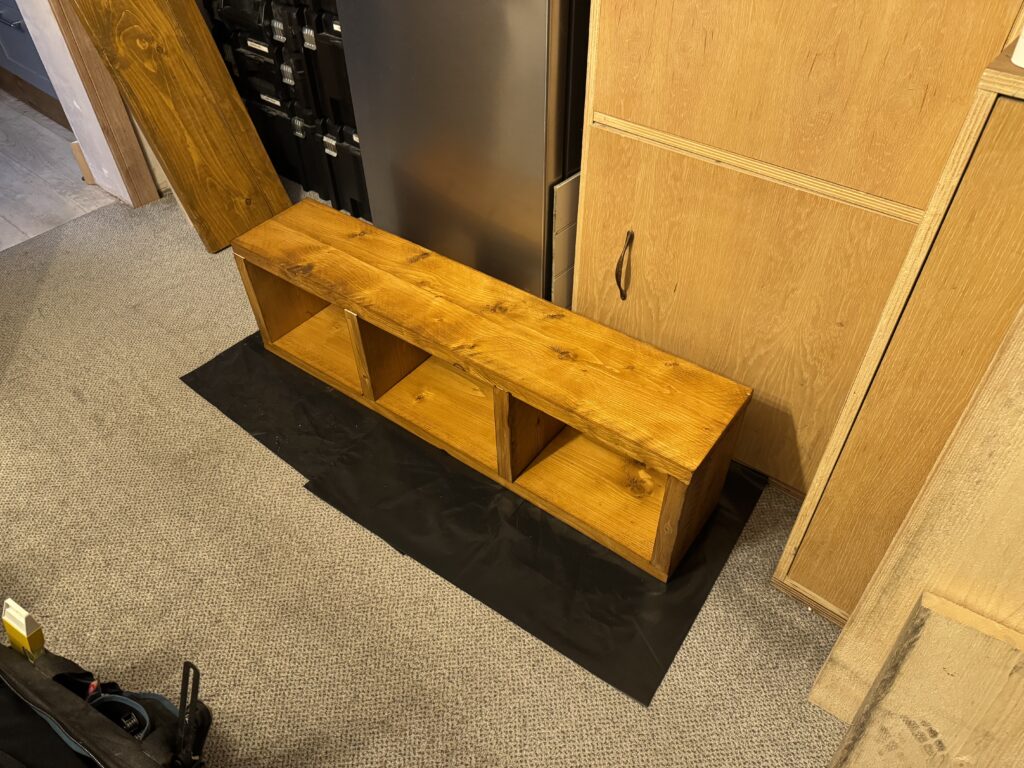
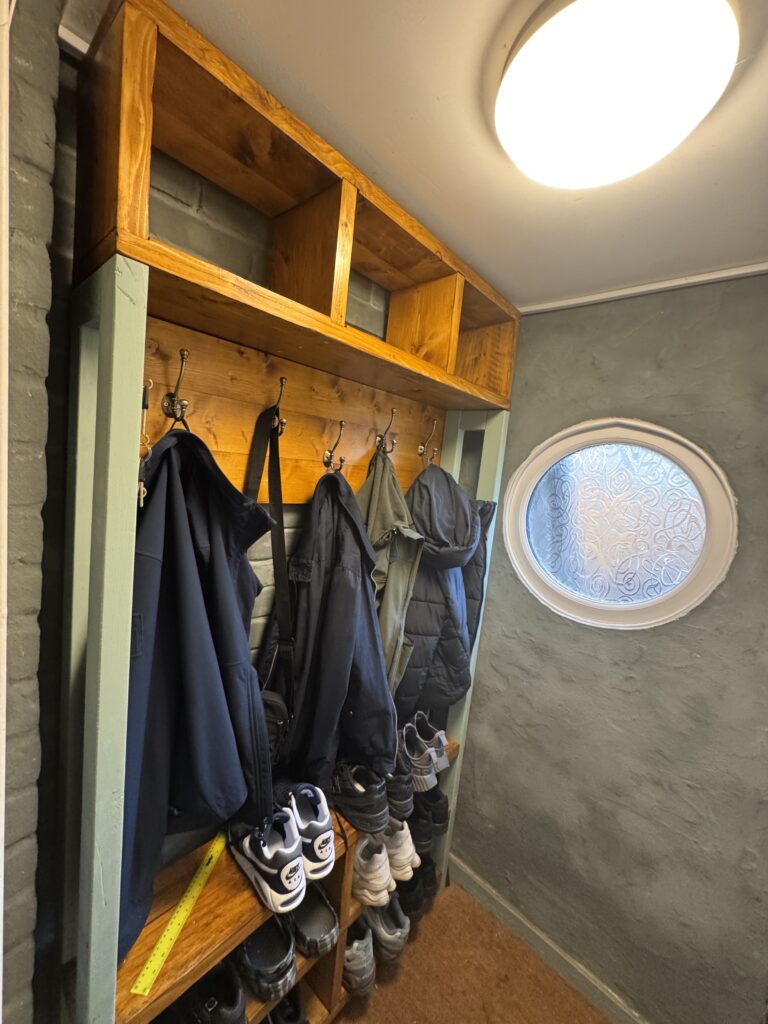
This leads me to the thing that was on my mind – the rack was supposed to run from floor to ceiling, so the 35cm gap at the top was to all intents and purposes wasted space.
So I decided that I was going to make a box shelving unit which would sit on top of the rack which could be used for things such as hats, scarves or other junk that my kid tends to leave laying around!
Beyond the dimensions, I didn’t really have a sketched plan on paper – just an image in my head which for this project was enough as, it has to be said I have made own fair share of shelves over the summer!
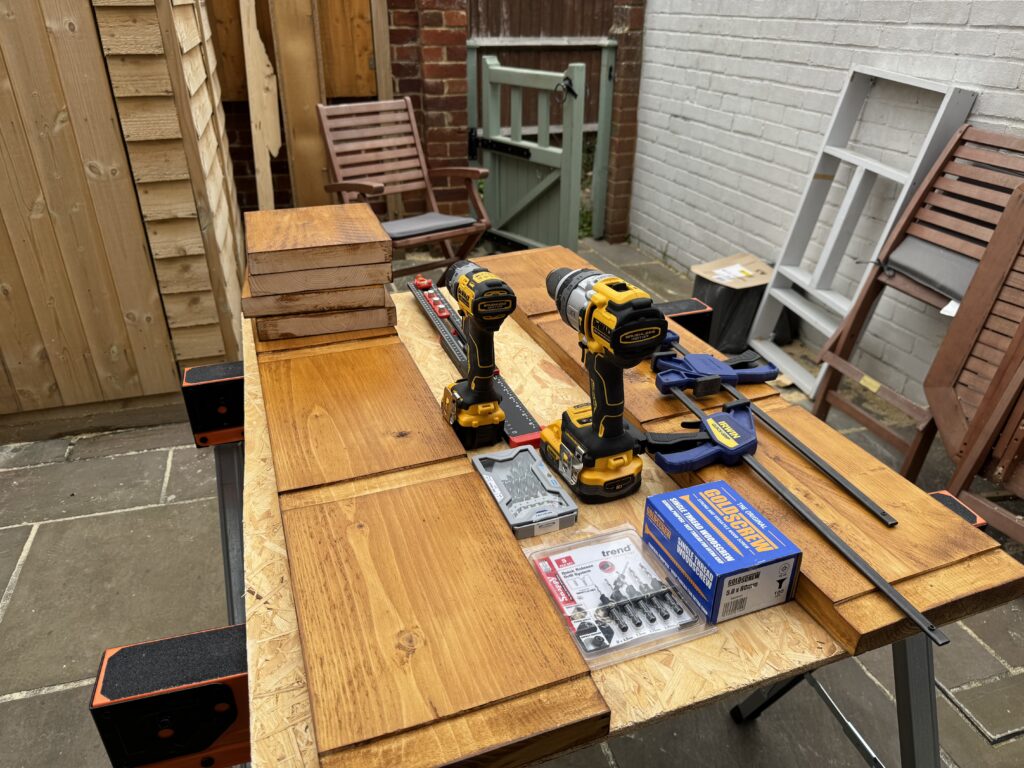
Tools used on this project:
Tools | Purpose | Model / Product |
Drill Driver | Drilling pilot holes for the screws and then driving those in to place. | |
DeWalt Combi-Drill | Used for drilling pilot holes for the frame and shelves. | |
Electric Mitre Saw | Used as a chop saw to ensure accurate cuts for the frame and shelves. | |
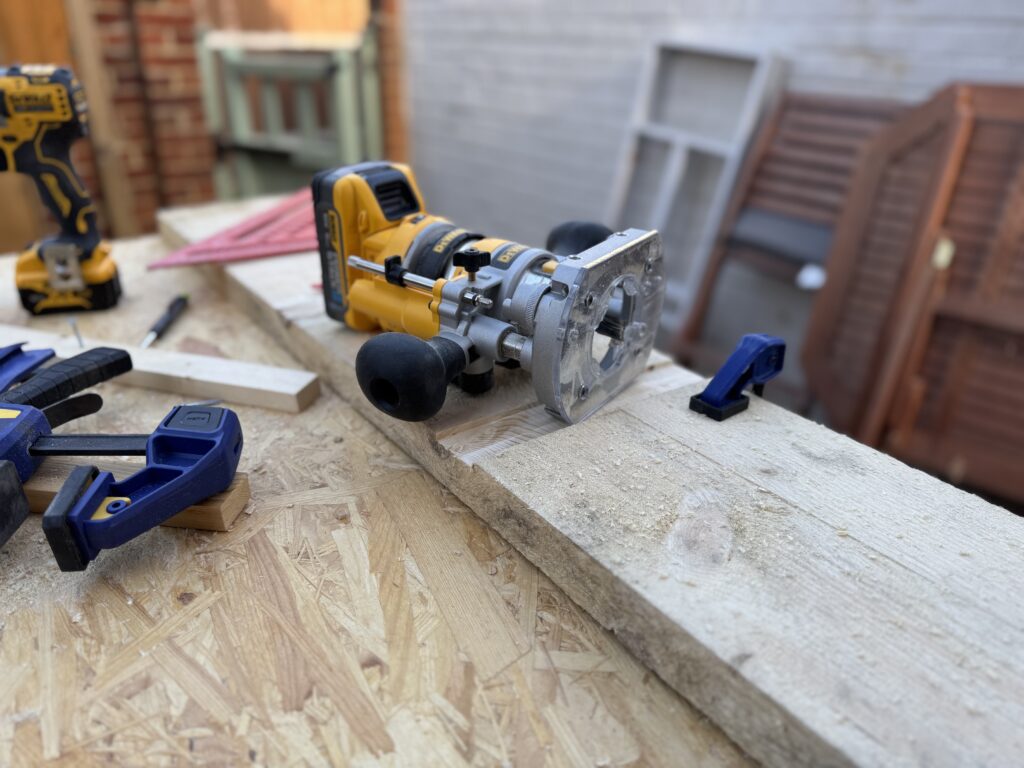
Trim Router | Used to cut the channels in the wood for the frame. | |
Orbital Sander | Used to take the timber from 80g to 180 and then finally 240. | |
Rubber Mallet | Used for fitting the shelf and frame into position without leaving dents in the wood. | |
Irwin Clamps (x 4) | Used to clamp down material being worked on. Also used to hold material in position and level when being joined. | |
Speed Square | Used to make sure that the frame and shelves are square before and after joining. | |
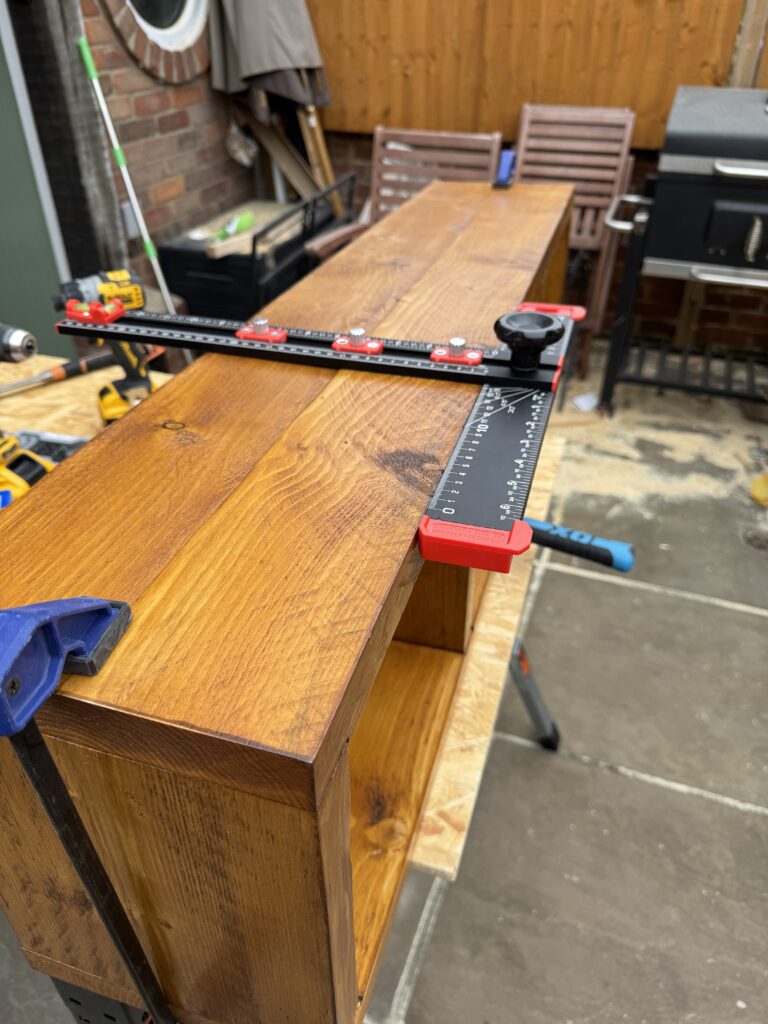
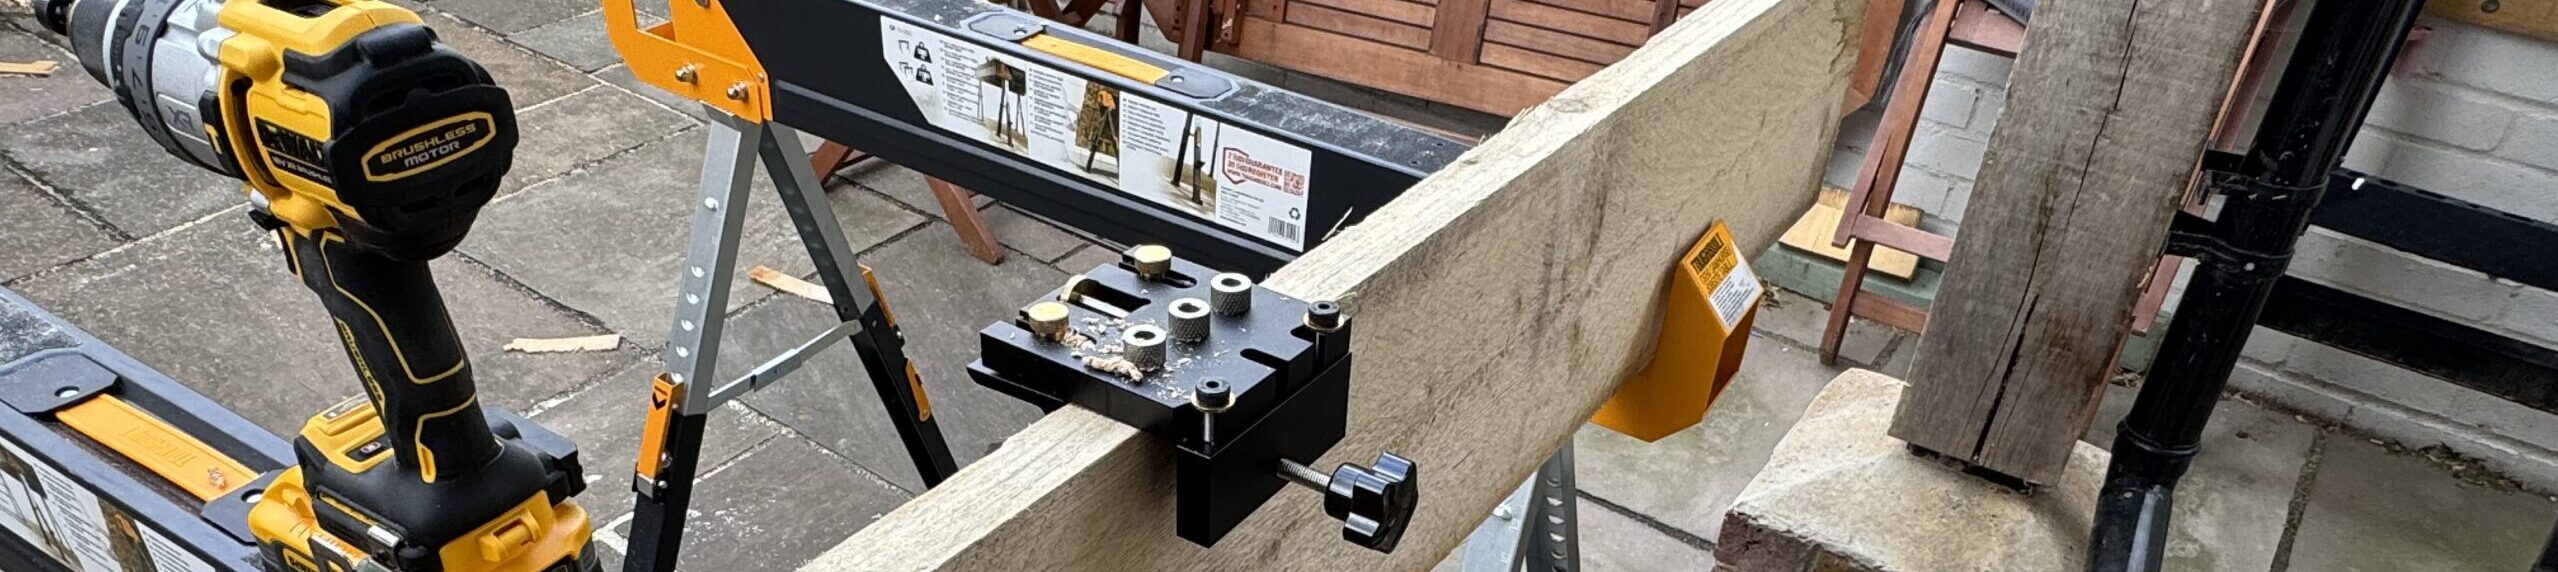
Saker 4-in-1 Drilling Positioning Ruler | Used for accurate placing of the holes for the frame screws. | |
Spirit Level | Used to make sure that the unit is level (kind of obvious really - I can't make this sound sexy or technical). | |
Saw Horses | Used as the main base to support all the materials whilst being worked on. |
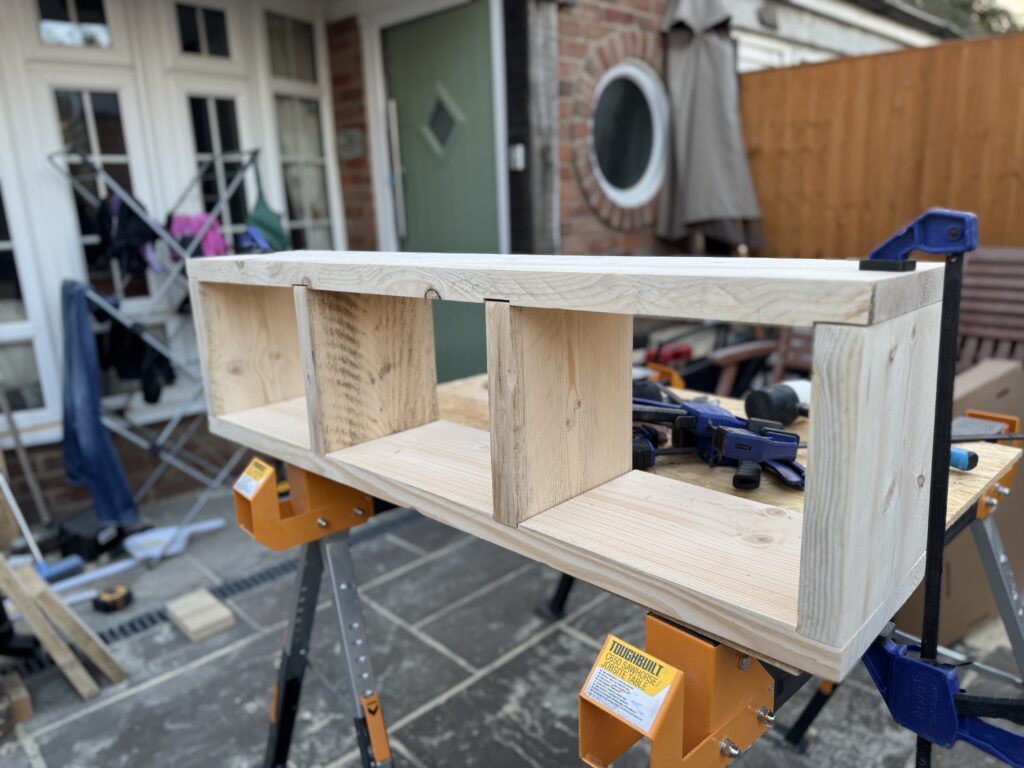
I started out by cutting the top, middle and bottom shelves on my (at this point – new) Miter saw to 1110mm in width.
The saw is a DeWalt DCS365N 18v which is a huge improvement over my trusty DWS773. Don’t get me wrong the DWS773 has been an excellent tool which I have used on loads of projects – but it had it’s limitations.
- Being 240v corded model – having to break out the extension lead to work outside in what is already a small space was a hazard – no matter how careful I was running the reel.
- The operation of the safety feature in order to power the tool on was cumbersome. There was a palm button on the back of the handle to retract the blade guard, and a really awkwardly placed safety button at the top of the handle to enable the power button and then the power button on the front. You had to operate all of this at the same time – and if you have relativity small hands like mine it actually encouraged poorer safety as I would mostly need to use two hands to just get the blade spinning. When you look at the picture (below) you might think that it is not that much of a problem – but it bloody is!
 The other problem for me was if you got your hand in the wrong place to retract the blade guard you could trap bits of your hand in between the plastic of the handle and the palm handle and that bloody hurts!
 - The DWS773 doesn’t come with a blade guide light or laser. Now this hasn’t been a problem as I just learned how to take measurements for cuts that took into account the Kerf of the blade (if you don’t know what a Kerf is or have only really heard about in in the winds and are wondering why your cuts are coming up short or long from what you measured – have a look at the video in the Kerf link – it will change your cutting life). Whilst understanding the Kerf is a useful skill to have – it’s boring, especially when you just want to cut something quickly. The DCS365N comes with a light which shows you where on the material the blade is going to cut so if that matches the measurement line you have struck – then you should get an accurate length without having to do the Kerf math.
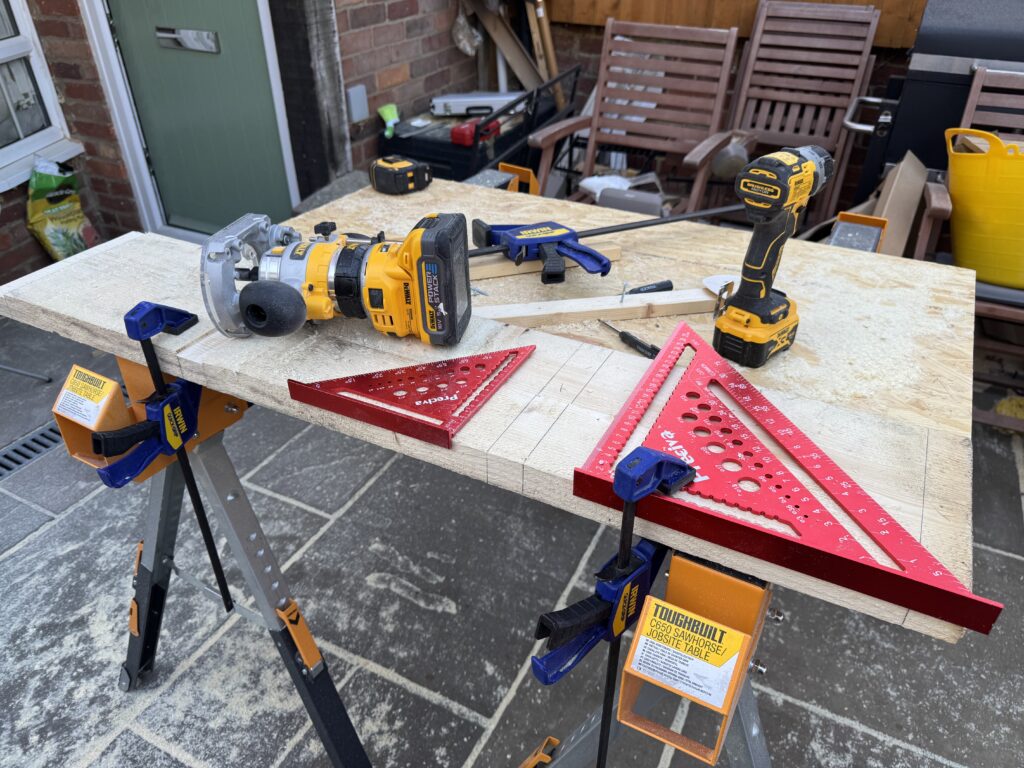
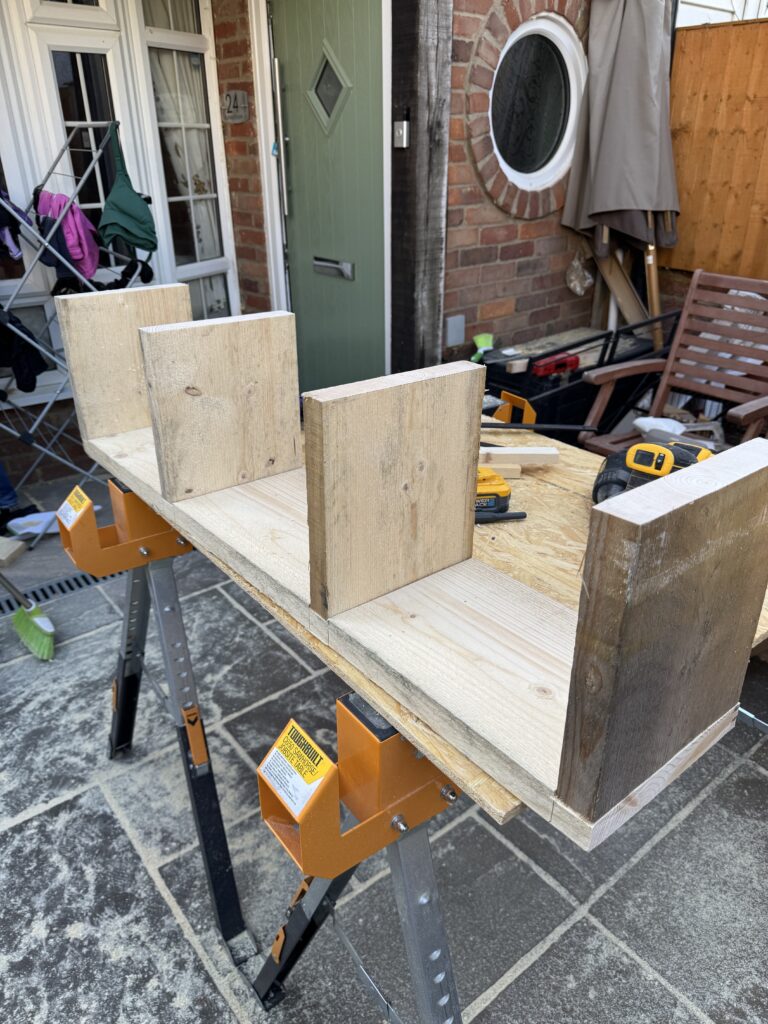
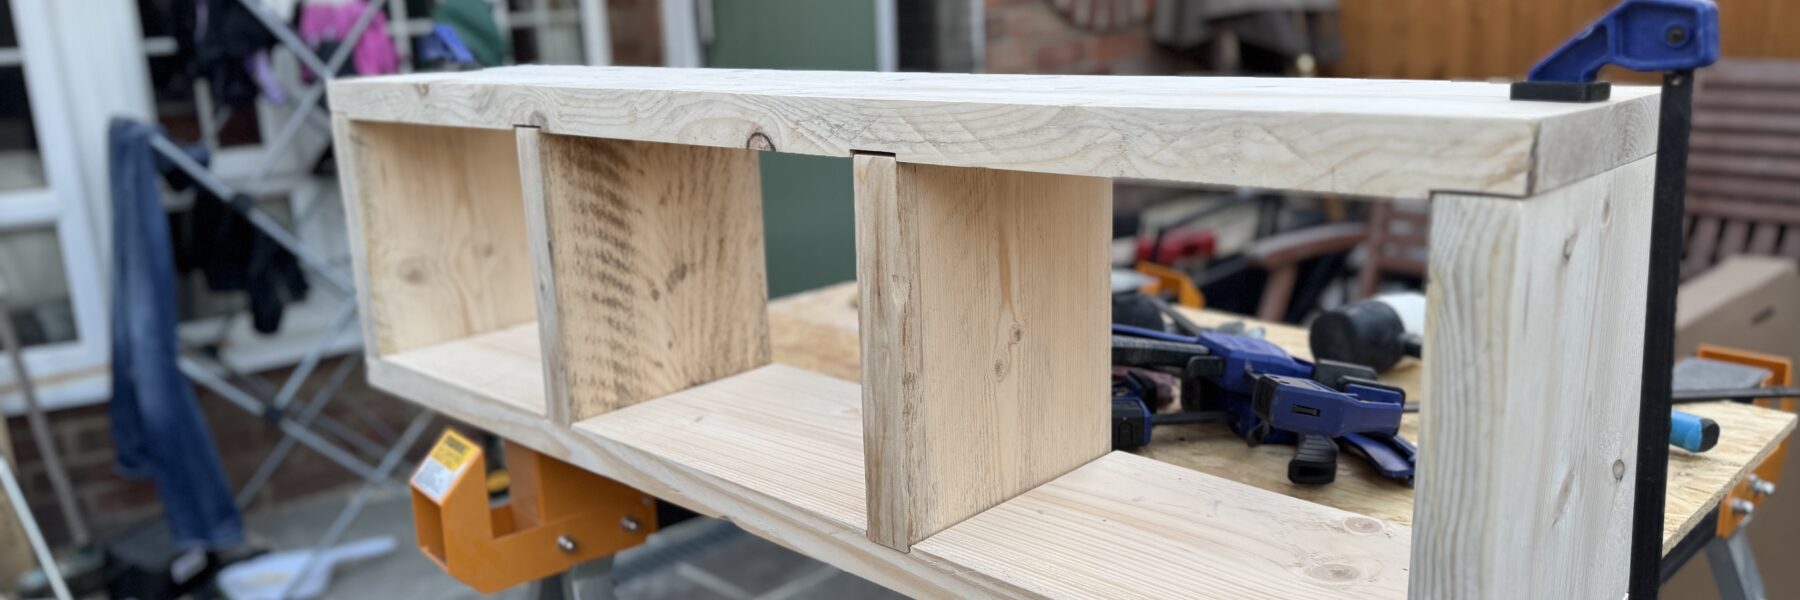
Anyhow I digress – after I had cut the materials I was ready to mark out where the shelving spacers were going to be placed within the frame. These I measured evenly, marked them off using my rafter squares and then used my Trim Router to cut the channels to around a depth of 4mm.
I then did a quick dry mock up of what the assembled shelf would look like (which I do mainly to ensure that everything lines up, is square and level).
After that was the usual process of sanding. Again I take the material from 80 grit, 180 grit and then 240.
I am not sure if I have explained why I only go to 240 in terms of sandpaper grit. The main reason is that on most of the stains that I use that is the recommended maximum. Going higher makes the fibers on the surface of the wood too compact and as a result the stain doesn’t penetrate the material.
This results in inconsistent finishes – or it being easily scratched.
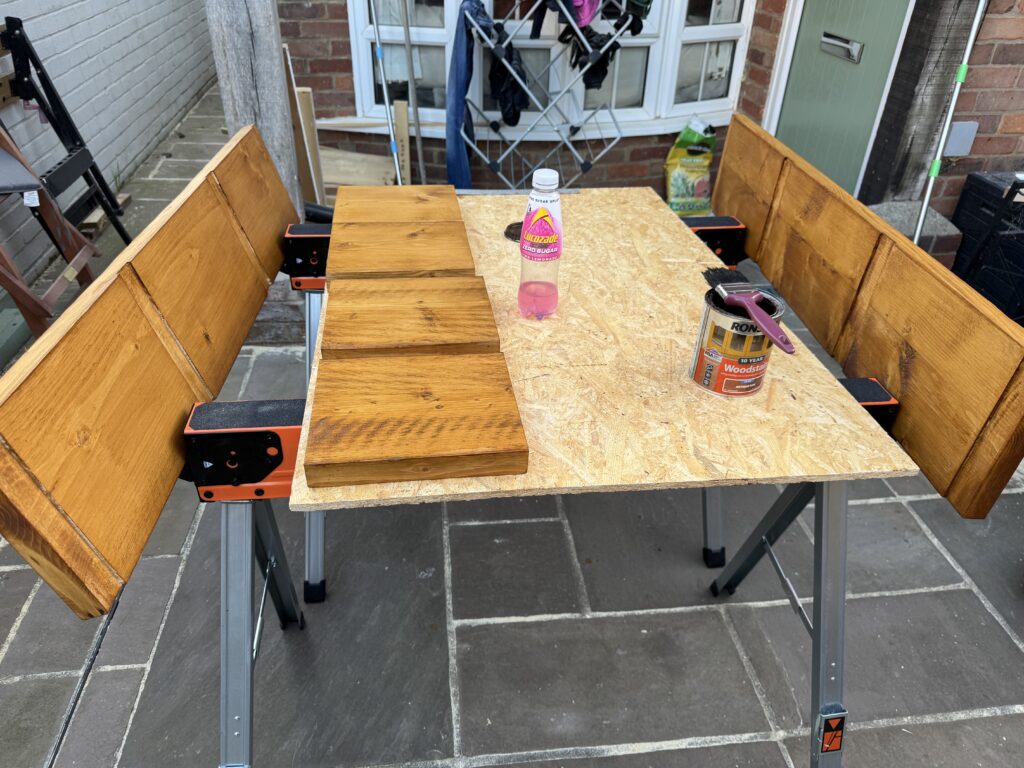
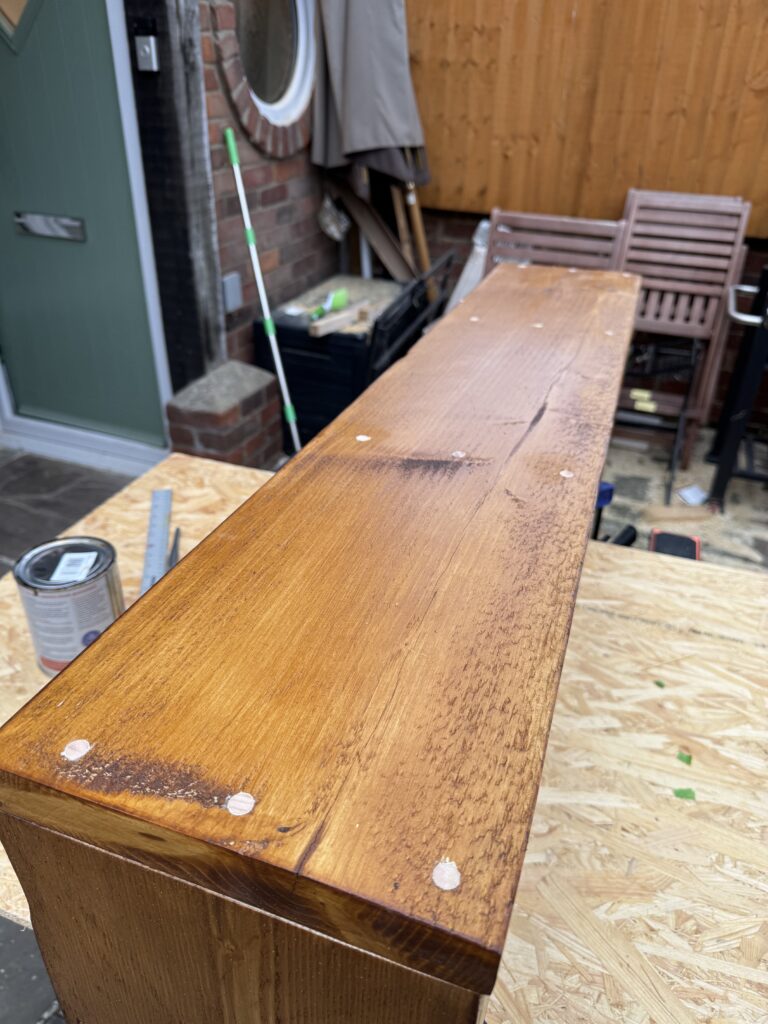
Speaking of staining – that was the next step. I again used the Ronseal stain that has been really impressive in terms of use and finish. The recommendation is that you leave 4 hours between coats with a maximum of 3 – but I have found that if you are careful when applying the first two coats and apply it thinly and gently with a brush you can get away with about an hour and a half between coats.
I also use a lint free cloth to clean up excess stain.
Before I do the third and final coat, I do a very light sand with a 600 / 800 grit sand paper. Now you might be thinking you just said “don’t go beyond 240 grit” – yes that is true for the bare sanded wood – but – at this point I have two coats of stain on the material and in this case a sand is actually good for the finish.
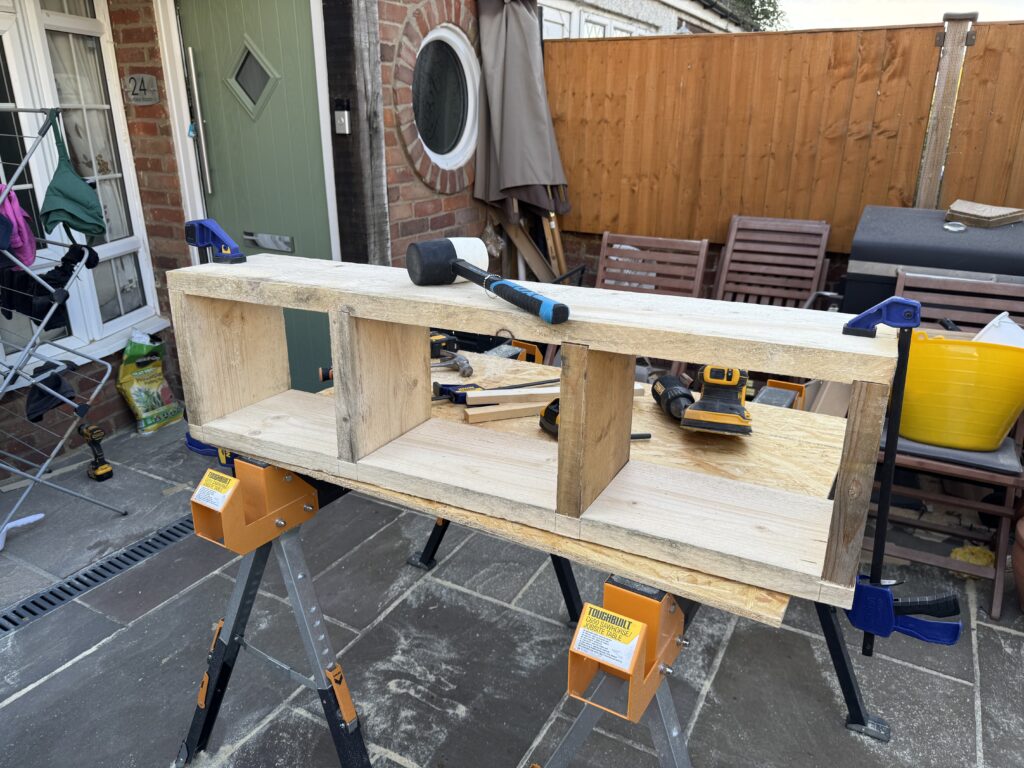
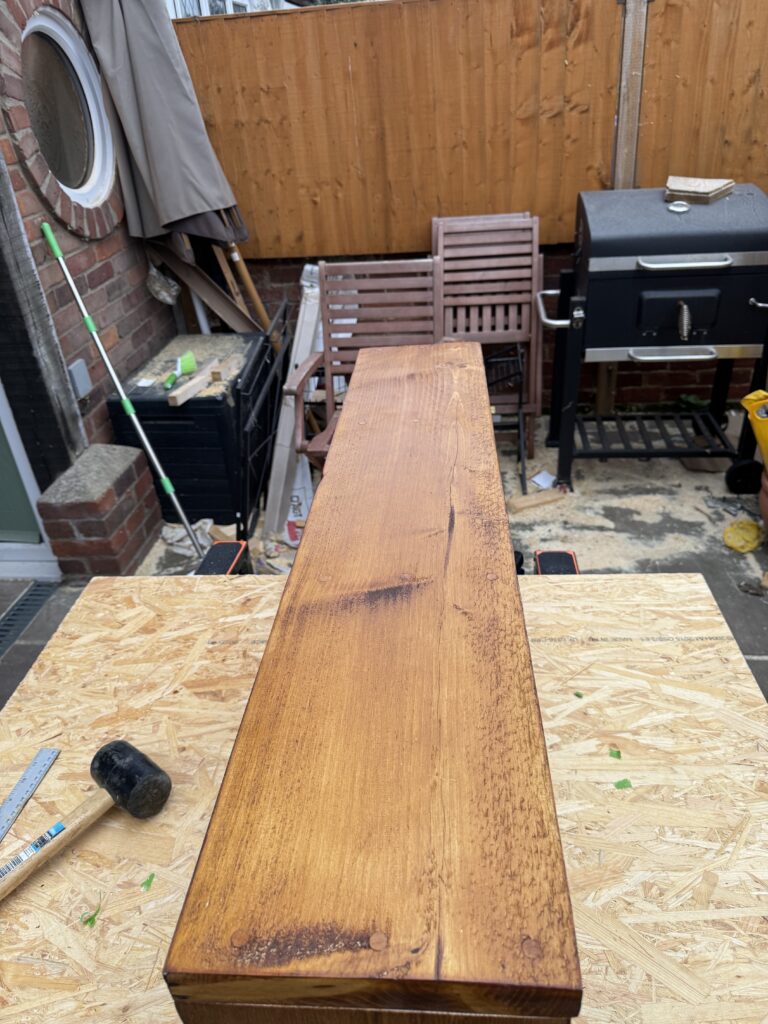
With the staining completed it was time for final assembly.
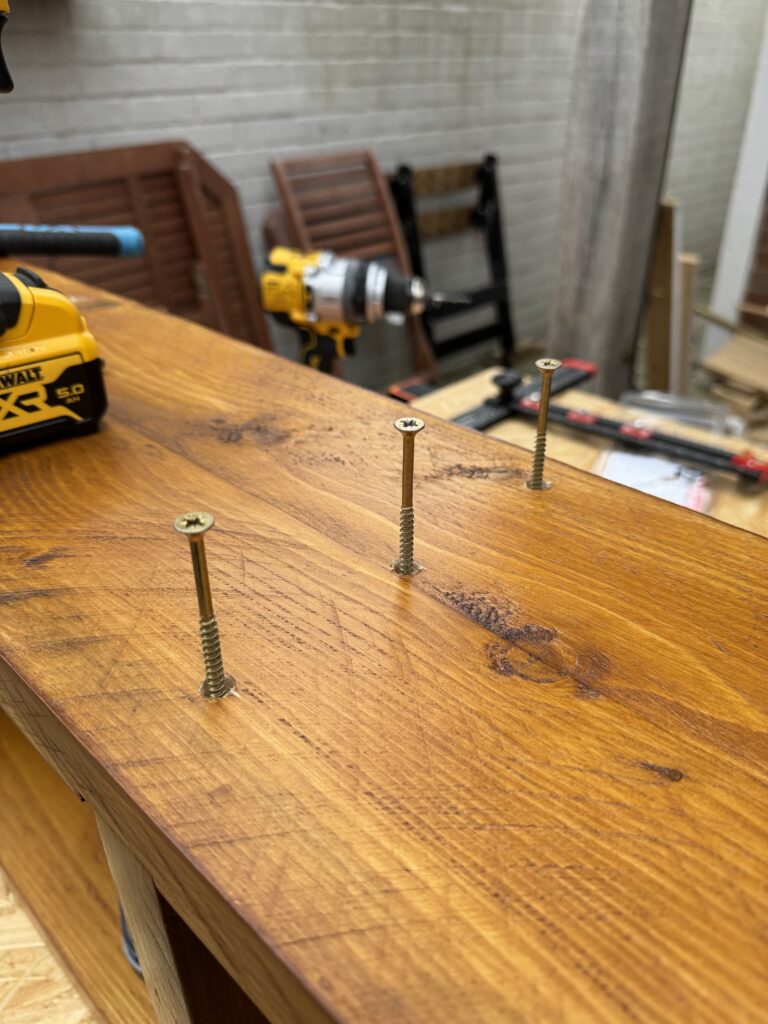
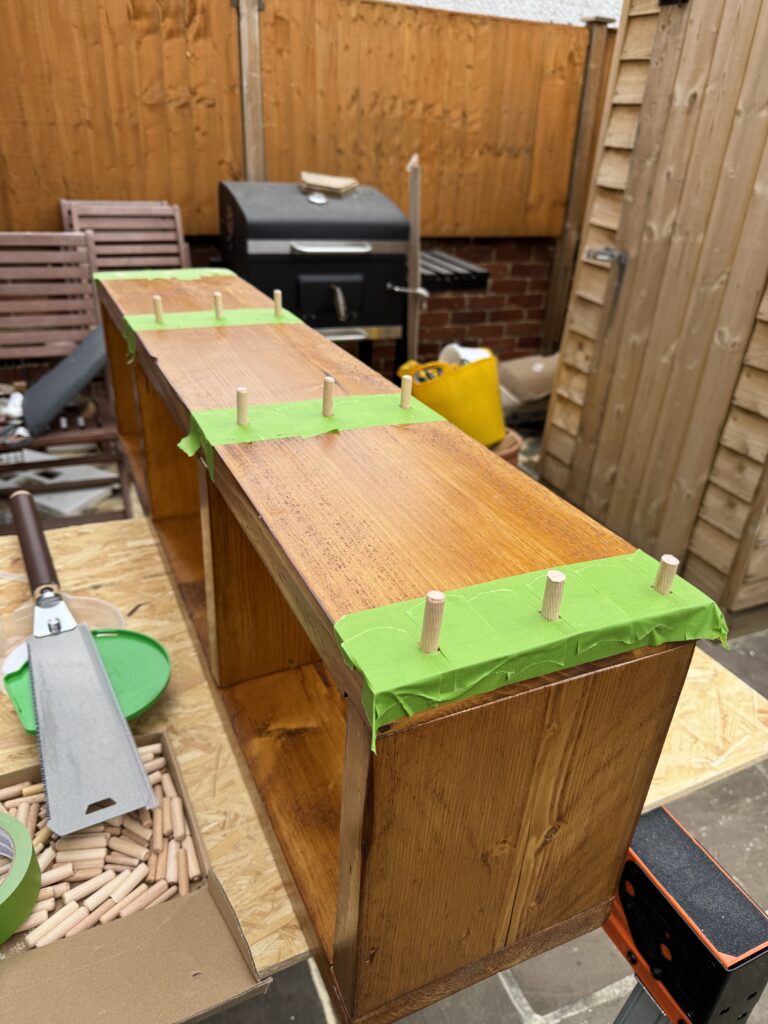
I knew that I was going to need to drill pilot holes in the top and bottom of the shelving directly into the spacers. This would mean I would need to plug the holes with dowels as I don’t like visible screws on projects that I make – well, at least my most recent work. To secure the elements together I used 80mm wood screws – in particular Gold Screw 5mm x 80mm with PZ heads – they are excellent!
Spacing the screws out was made easy due to my Saker Position Ruler – which means the holes in the frame are consistent. You just place the ruler square on the frame, move the screw position notches into place and drill a pilot hole.
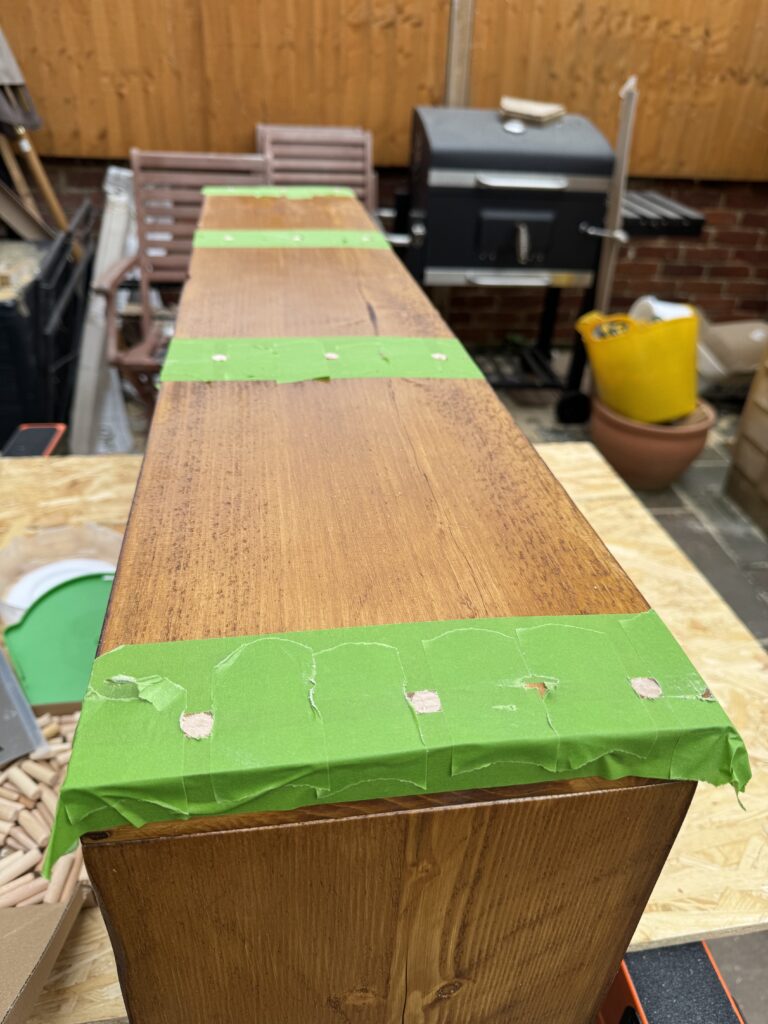
Of course by using dowels that meant I would need to countersink the screws beneath the surface of the shelf, tap the dowels in and then cut them with a saw. This then meant I would need to mask around the dowels with Frog Tape to protect the stain finish. Whilst I know that this isn’t what Frog Tape is designed for – but it is actually quite good at it as long as you take the cutting slow and gentle.
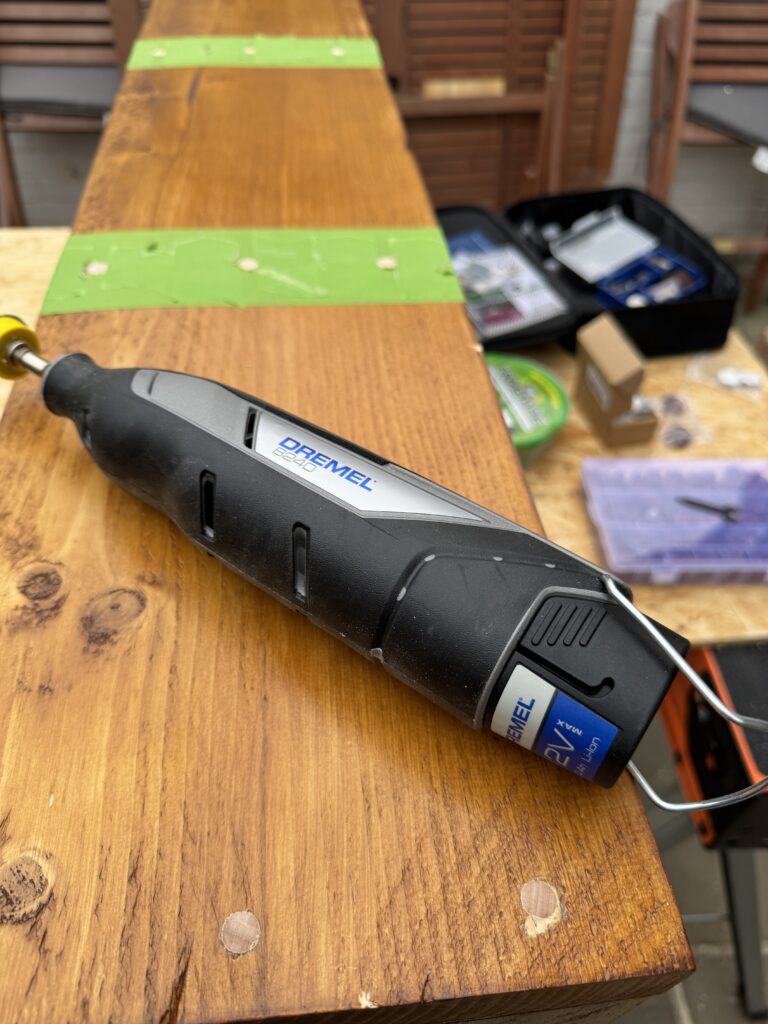
I then finished off the cut ends of the dowels with my Dremel F0138240JG using a 180g flat sanding head and then did a spot stain on the plugs.
With that completed that was the shelf all done!
You can see in the gallery below some of the shots of the process that I wrote about above.