
I was asked by a friend the other day who is interested in getting more into DIY – what would be my top tips?
This was interesting, as up until now I didn’t really think that I had any – but as I thought more about it – there was a whole set of things that I wish someone had told me before I got started!
I have had a whole series of near misses (and in one case, not so much a miss) in terms of safety and – I have made my own fair share of mistakes made which have been costly or made something worse!
So I thought that I would share them hoping that they might help someone along the way.
- Safety first.This might seem like one of the most obvious considerations – but you’d be surprised how easy it is to get hurt doing a DIY task which might seem really simple!
- The basics apply here – wear appropriate gloves for the task, eye protection at all times, dust mask for tasks which produce a lot of dust or anything that throws off fumes, ear defenders for loud tools – such as multi-tools and saws.
- In the case of gloves, use the correct type for the work that you are doing! If you are using machinery – is it safer to not have something on your hands that won’t get pulled into a blade / spindle, or do you need to be able to “feel” what the tool is doing where a thick glove would dampen that feeling? Are you working with a chemical which will penetrate cloth based gloves – if so perhaps a vinyl option would be better.
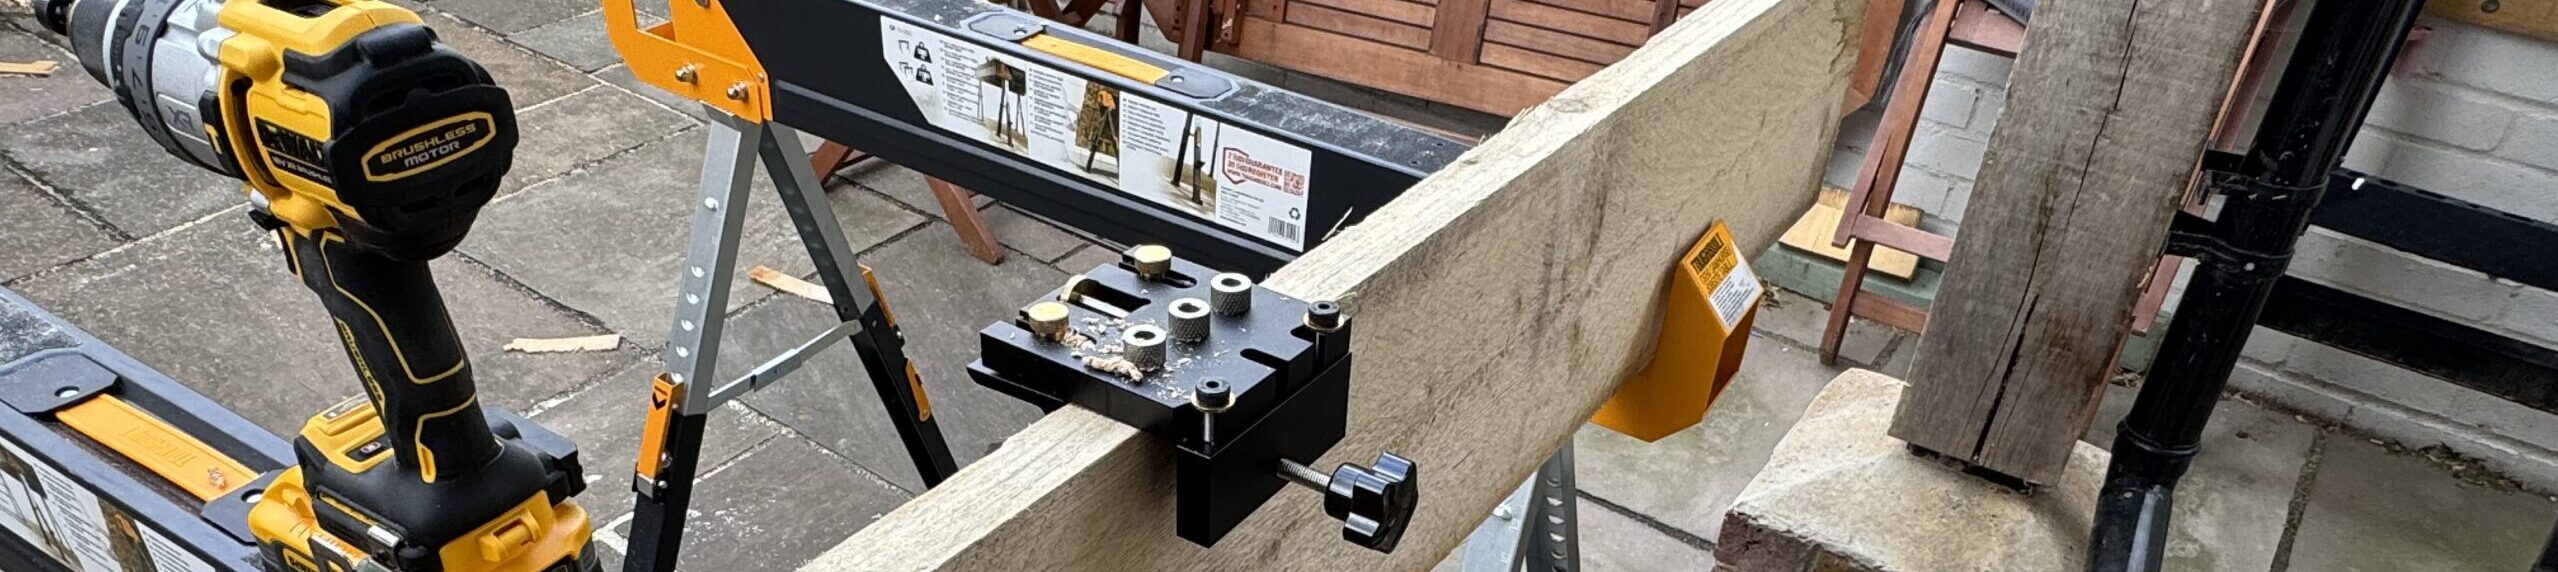
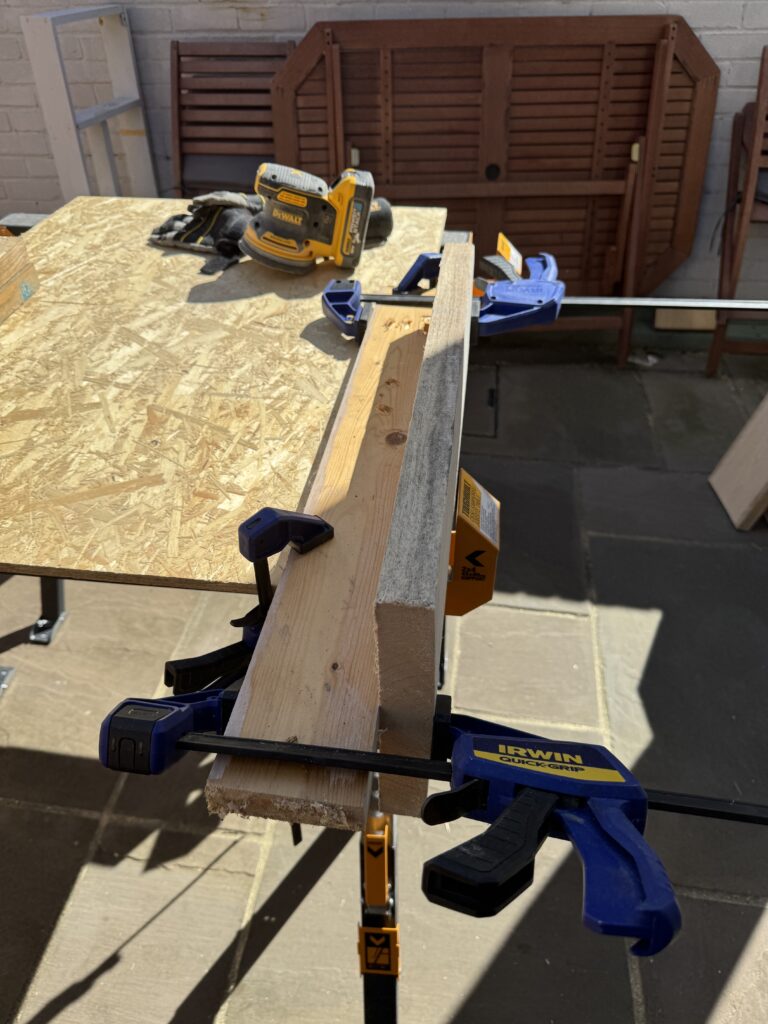
- When cutting or screwing – or doing ANYTHING where the material could move – secure it with clamps. Avoid holding anything in place with your hands where they can either slip into a blade or the material can get rotated and you sustain an impact or twist injury. Yes – clamping adds time to a project or job – but you will have more control over the tool and get a better result.
- Before you begin, go in with the mindset that you will get hurt and with that in mind – think of everything that you can do to stop that from happening.
- Tools and situations are unpredictable – I was once using an Impact Driver in what I thought was a totally safe way – the next thing I knew I had a broken finger as I drove through a screw that I hadn’t thought about in the other side of the material I was working on. The said finger is still fucked two years later!
- It is easy to look at a tool that you have and think “that will do” even if it isn’t designed for the work that you want to carry out. Just don’t do it. Worst case you will injure yourself – best case you will destroy the material you are working on. An example being; don’t use an impact driver fitting kitchen cabinet doors – or drill a hole into solid concrete using a basic combi-drill.
- Stay focused and pay attention at all times. This is an odd one. A lot of DIY tasks with tools are repetitive so you can lose focus and just assume that bit of wood you are cutting is going smoothly – until is bites and throws the saw into your hand. Also, you might be really concentrating on something that is dangerous – and for a split second the wife calls you, something appears out of the corner of your eye, you de-focus and there’s a finger on the floor. If you’re working on something intricate – make sure there isn’t anything that de-focuses you. I had an incident recently where I was using a palm Jig Saw and my lad popped his head out the window to say good morning and the blade jumped and I was lucky that my cutting position ensured that nothing vital to me was in the way!
Get the right kit to secure the material(s) that you’re working on. Securing your project whilst you’re working on it not only helps you remain safe, but also will help you get better results. A good place to start is get hold of a set of decent saw horses – preferably ones that can also take a couple of 2 x 4 lengths of wood which means that combined with a bit of sheet material such as 12mm OSB will turn it into a work table.I personally use Toughbuilt C650’s – which are solid enough to probably survive a nuclear blast, but are lightweight and competitively priced. It is also a good idea to get some decent clamps to combine with your saw tables – I can highly recommend Irwin clamps – they have a large range which can be used
for just about any situation you can think of and they are reasonable priced.
- The old adage “measure twice, cut once” is so very true. If you spend time being sure of your measurements then you will get better results.
- Don’t buy cheap tools – especially power tools and accessories such as bits! I am not saying that you need to buy top of the line, but don’t skimp with middle aisle “Lidl” tools. My dad was a master carpenter and he always said to me spend the money on the tools and you will make the money back.
You will get better results and it will be safer for you personally. - Look after your tools and they will look after you! Clean them appropriately after you have used them – store them correctly and service them regularly.
- Use the right tool for the right job! I have mentioned this in the Safety First section – but it is worth a tip in its own right. This is a common mistake that I see with people who are new to DIY – using the wrong tool for a task. At best, this usually ends up with a poor end result, at worst it can be very dangerous especially in the Sawing and Cutting areas. There are many examples that I can think of here – but the most common that I see is using an Impact Driver for screwing tasks which should either be done by hand – or – would be much better suited to a Drill Driver / Screwdriver.
In the case of using an Impacter for screwing – remember these type of tools are designed for ramming heavy duty screws into dense materials (such as thick cuts of wood, concrete, masonry) or attaching bolts to metal (and often, in that case it is more appropriate to use an Impact Wrench). In another example – lets consider the simple hammer. A hammer is a hammer right? Wrong! – there are many types of hammer and they are typically used to achieve slightly different things. - Research, Research, Research! If you’re serious about getting into any kind of DIY and you have little experience spend some time on the Internet watching videos on how various things are done. This is especially useful if you have something in mind for a project – have a look for it as the chances are someone has had a go before you. There’s a lot of very good creators on Instagram, TikTok and Facebook who churn out some truly amazing stuff and they document how to do it very well. Even if you don’t find exact step by step guides you should be able to find something that will give you a clue on how to go about something.
Online tutorials can be especially good when learning how to use a new tool – a good example would be how to operate a Trim Router. - Start simple, and start small. There is often the temptation to run at something large when you have a low experience base. One of my first, big DIY projects was re-fitting my kitchen. I didn’t really know what I was doing at the time and didn’t really have all the tools needed to do the job so suffice to say the end product was shit. Two years later for a number of reasons I had to refit the same kitchen, but by this time I had gained a lot more experience (and tools!) and the end result is beautiful. It is also tempting to make something and you run out and buy the best materials you can – but then it doesn’t go according to plan. Quality wood (or quality anything) is expensive – so, if you’ve not done something before buy cheaper materials and do a few test runs before you move onto the main feature!
- There is no such thing as waste wood! Linking in with measure twice, cut once – if you are doing that properly you should have less waste product. Where you do end up with off cuts, keep them – no matter how small they are. I can absolutely guarantee you that you’ll find a use for those off cuts, even if it to use them as Jigs or braces for other projects you will do down the line.
I cannot tell you the amount of times in the early days I would be working on something and think “If only I had a piece of wood of x size to clamp this down” only to remember the week before I threw away a bit of material that would have been perfect!
This also applies to things like screws. If you remove a screw from something and it is not bent or stripped – keep it (unless it has been previously used for load bearing applications in that case, use a new one). If you think about the amount of perfectly good screws that you have chucked just because you have a new box full of them you’ll probably come to a monetary figure that will surprise you and hurt your pocket! - Have a plan – or at least some measurements! I will admit that I don’t always know how I am going to approach a project – or – how exactly how it will look – but I will always have measurements and a basic sketch to guide me. Even if you just jot down some words about what you’d like the project to achieve (typing that into ChatGPT can give you some ideas – it will set you on your way).
- Don’t attempt electrical work unless qualified or have experience. No one gets an award for understanding that electricity is dangerous. What they do get is to live. You will see posts on here where I have modified the electrical installation on jobs – but all that work is done within the limits of what:
- I am capable to doing.
- My understanding, through training of how Rings, Radials, Lighting and general domestic cabling works.What I will NOT DO is go near the CCU or what is classified as “Special Areas” – which does get complicated as there is s a difference between UK Part P regulations and BS 7671 regarding Kitchens – which is why little nuance such as this is why you should use a professional Sparky as there is such much to understand.
- Know your limits. If you feel uncomfortable doing any DIY task – or just do not know how something works – stop! At best you will cause more problems for yourself – at worst, again you could get hurt. There’s no shame in saying “I don’t know how to do that” and there is always “But I can go away and learn“.
Anyhow, for now all of the above is all I can think of, but I may add more to this list as I am constantly learning new things with every project. Feel free to comment with your own tips and tricks and I will quite happily add them (or course, crediting you 😀 ).